
Last Updated on July 9, 2023
This post contains affiliate links.
EDITOR’S NOTES: Aldi sold this telescope again in January of 2022 but for $34.99, $5 more than in 2020. See the update at the end of this post for additional thoughts after several telescope viewing sessions.
On a camping trip years ago, I viewed the moon through a friend’s telescope. It was amazing to see the moon’s craters and geography up close, and I felt like I couldn’t stare long enough through the telescope lens to fully take it all in.
Fast forward to the present time, when we’re all looking for ways to make our own entertainment at home, so when Aldi sold telescopes and microscopes for the 2020 holiday season, I jumped at the opportunity to purchase an inexpensive telescope for my own family to use.
The Explore One Starlight 350 Compact Telescope with Pan Handle Full Length Tripod (product code 51503) cost $29.99 at the time of publication.
As mentioned above, Aldi also is selling a microscope set for the same price of $29.99, but having spent plenty of time looking through microscopes in biology classes during my school years, the telescope held more novel appeal, so this review deals only with the telescope.
Both the telescope and microscope are Aldi Finds (Special Buys), which means they’re only in stores for a short time. Remember, Aldi doesn’t sell its specials online, so once these sell out at your local store, they’re gone.
According to Aldi, the telescope’s features include:
- The ability to see objects closer with 17.5x and 28x power magnification
- A 50 mm aperture lens for viewing the moon
- A full-length tripod that extends up to 42” height
- 2 eyepieces and a diagonal
- A dew shield with protective cap
- A built-in compass
- The ability to explore the moon, planets, and stars
The Explore One brand is not exclusive to Aldi. Explore One products are made by Explore Scientific, based in Springdale, Arizona. They make telescopes, microscopes, action cameras, weather stations, bird feeder cameras, and other devices that mix science and entertainment. They make several kinds of telescopes and use a naming system to denote skill level, with telescopes labeled as Explore One designed specifically for young astronomers.
You can purchase Explore Scientific products on their website, or from retailers such as Amazon.
I don’t see this exact telescope on Explore Scientific’s website, although you can purchase similar beginner telescopes there, so I think this telescope was made specifically for Aldi. Beginner telescopes on Explore Scientific’s site start at $35 and go up substantially from there, which makes the $30 Aldi telescope competitively priced.
On Amazon, I found a couple of 50mm telescopes that are similarly priced to the Aldi telescope, but for the most part the Aldi telescope costs significantly less than most beginner telescopes.
The Aldi telescope comes with a one-year warranty, with a six-month warranty for movable parts and consumables. The warranty is serviced by Explore Scientific, LLC, located at 1010 S. 48th Street, Springdale, AR 72762. Their email address is service@explorescientific.com and their phone number is 866-252-2811.

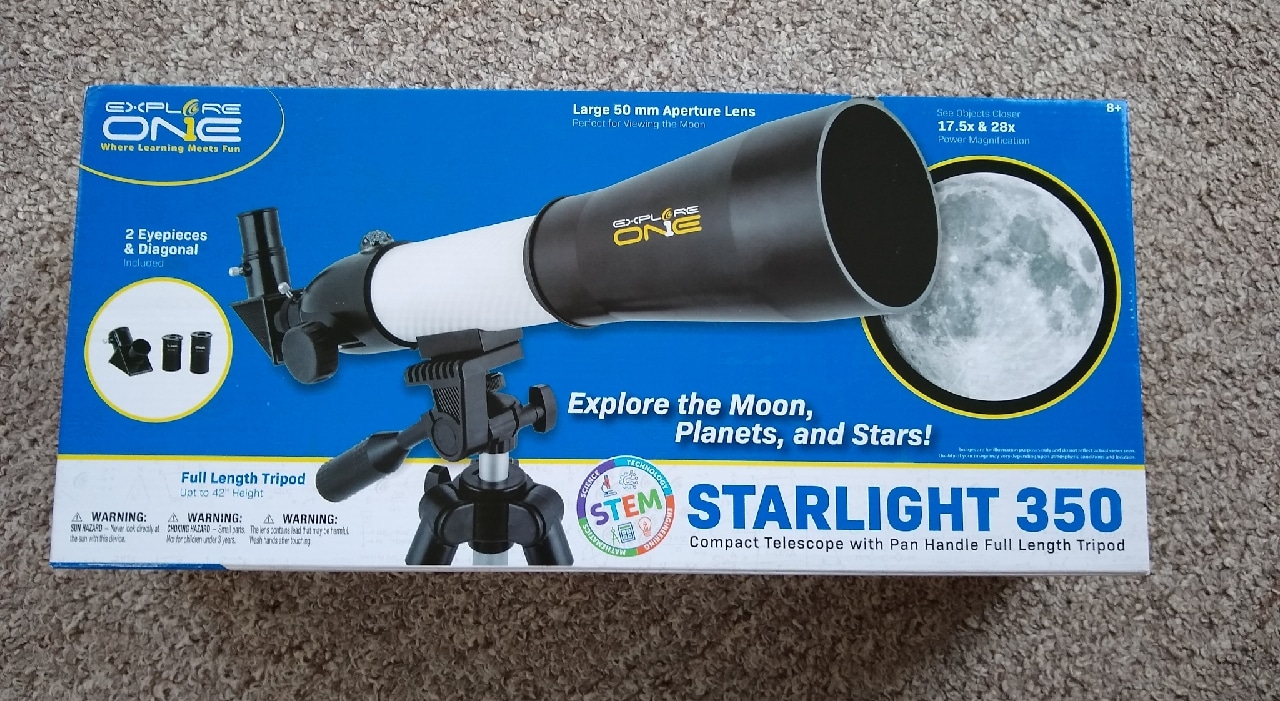
The back of the box. (Click to enlarge.)
According to the box, the telescope’s specs are as follows:
- Optical design: Achromatic refractor
- Magnification: 17.5x and 28x
- Front lens (clear aperture): 50 mm
- Focal length: 350 mm
- Standard eyepieces: 12.5 mm and 20 mm
- Finish: white carbon fiber wrap
- Tripod: full tripod up to 42″
Assembling the Telescope:
When I opened the box, it contained three boxes. One large box held the tripod, another large box held the telescope, and another small box held the eyepieces. The manual and warranty sheet were tucked into one of the larger boxes.
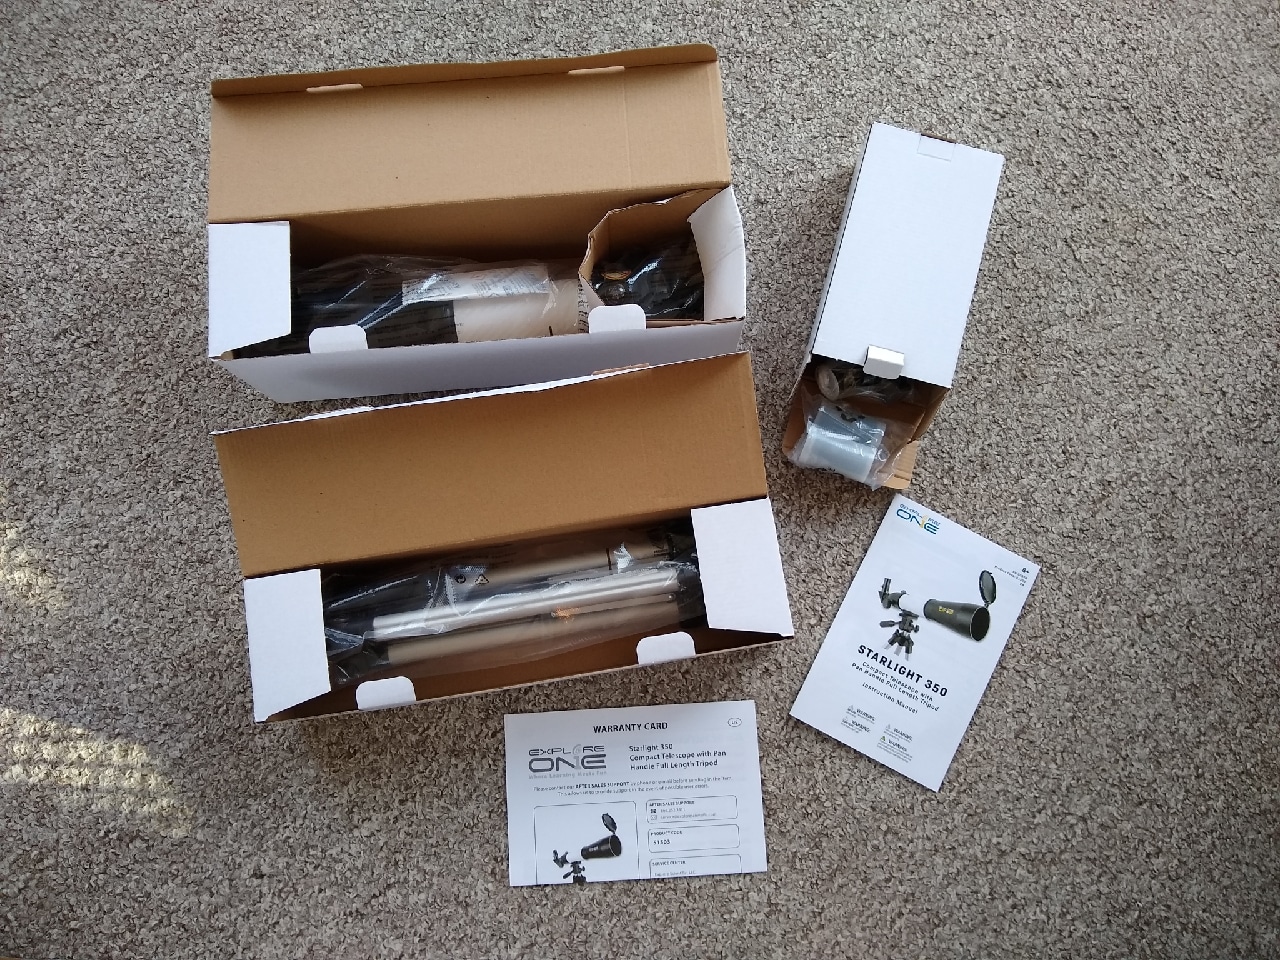
When you open the box, it contains three smaller boxes of parts, plus the manual and warranty sheet.
This telescope doesn’t have many moving parts and in theory was easy to assemble. I had some trouble getting the panhandle into an upright position and ended up unscrewing the handle to get it into the correct position, and when I tried to screw the handle back on, a metal nut fell out of the larger handle apparatus and it took me 15-20 minutes of fiddling to figure out where it came from and put it back in its correct spot. After solving that problem with the handle, the rest of the assembly went quickly.
The built-in compass, which consists of a small ball that sits in a hole on top of the telescope, fell off while I was assembling the telescope, and it had some lubricant on it and was a bit greasy to handle. I pushed it back in, and time will tell if it stays in place.
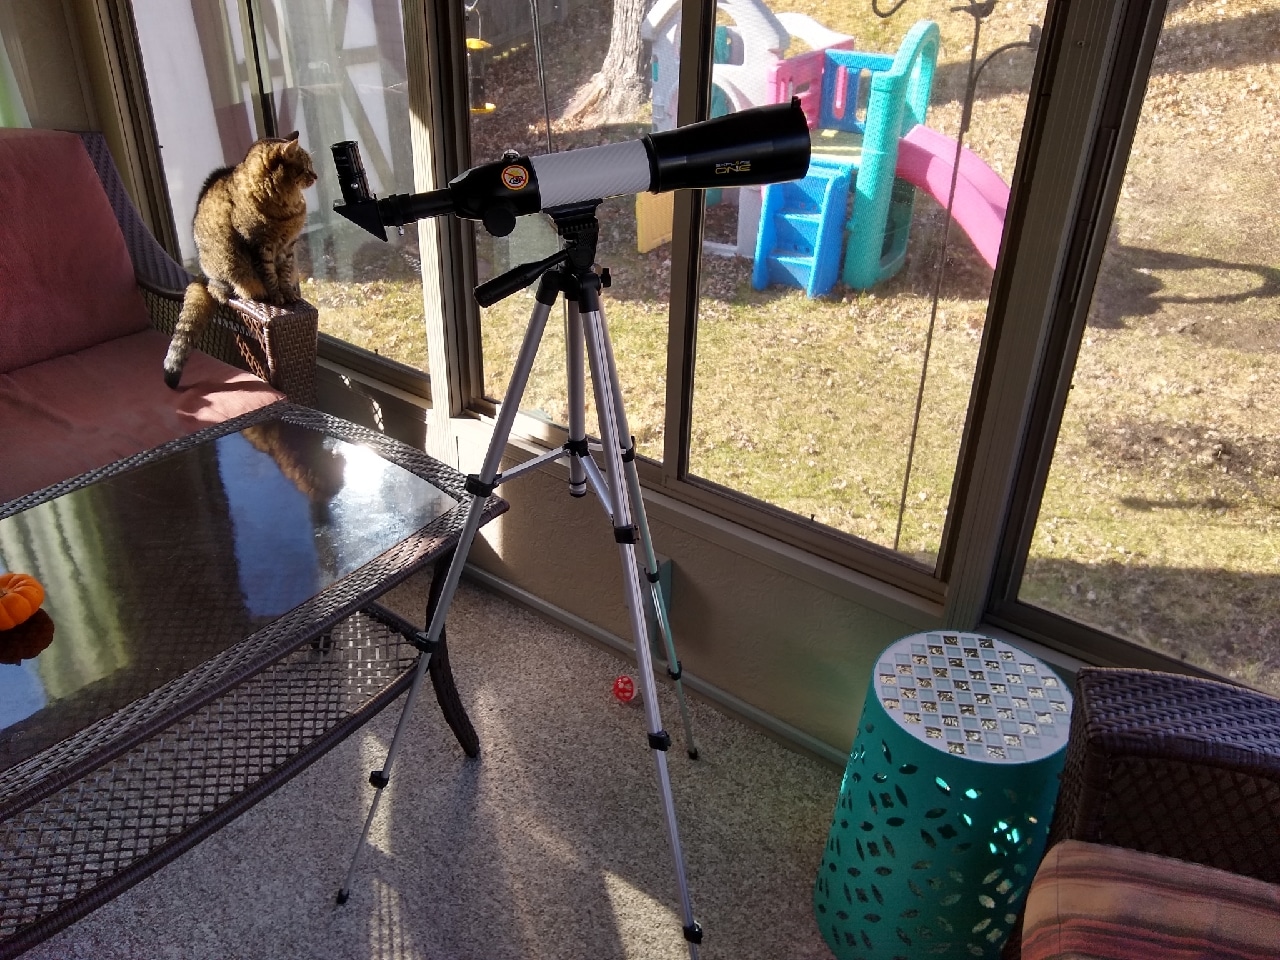
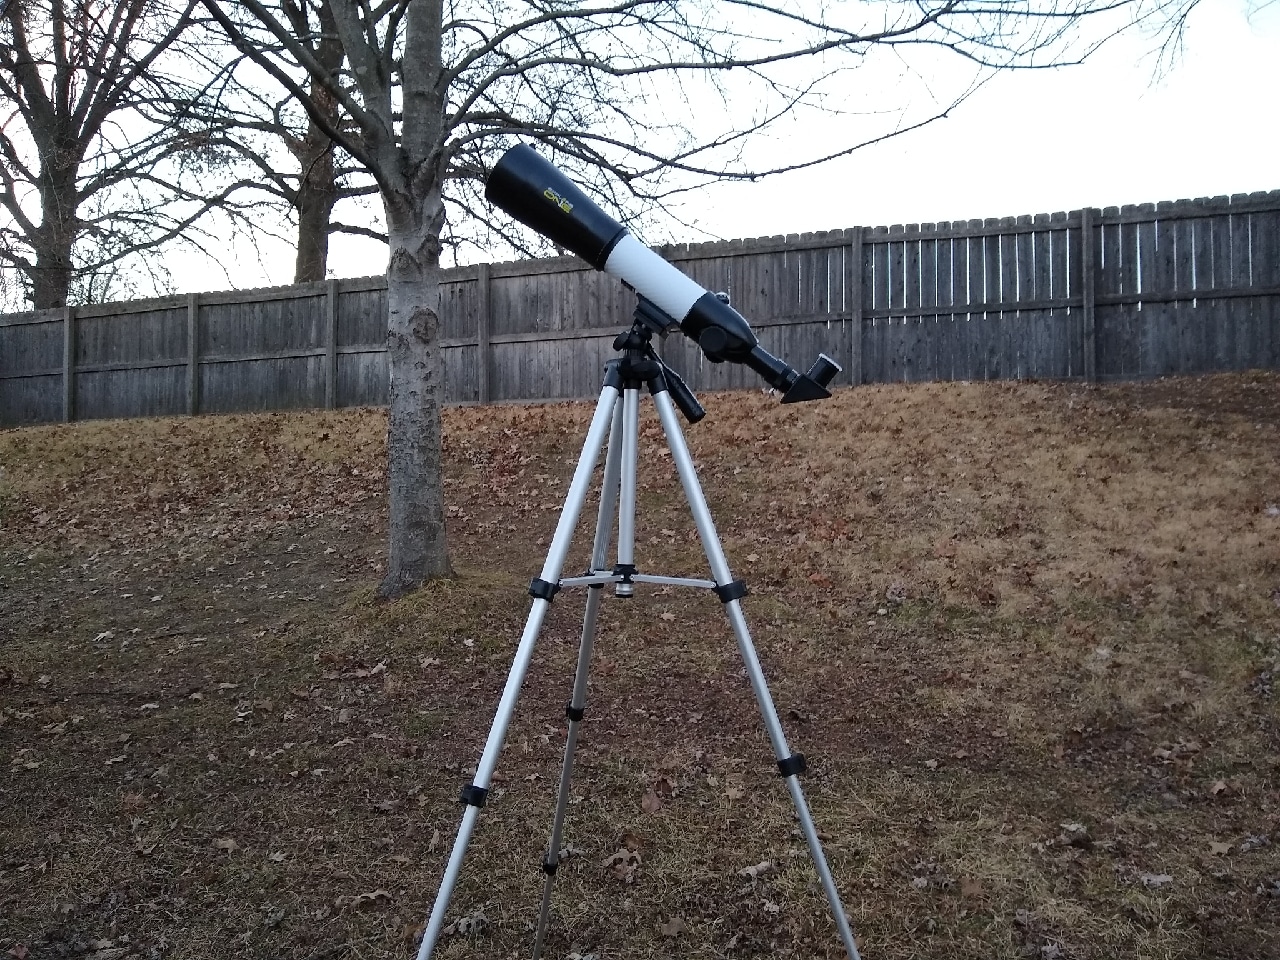
The assembled telescope, which we took outside to try out once it got dark.
The manual recommends setting up your telescope for the first time in daylight or in a lit room so you can familiarize yourself with assembly steps and all the components.
The assembly instructions are as follows:
- Open the tripod until the tripod spreaders are fully extended. To set the tripod height, unlatch the hinged locking mechanisms on each leg and extend or retract the leg to the desired setting. When the tripod is the proper height, relatch any open locking mechanisms on each leg before attaching the telescope tube.
- Thread the panhandle clockwise onto the mount head. (My handle was already attached to the tripod.)
- Set the telescope tube on the mount head so that the thread is aligned with the locking screw in the center of the mounting plate. Secure the tube to the mount by tightening the locking screw until it is secure. Be careful not to over-tighten the locking screw.
- Insert the diagonal into the focuser and secure it by tightening to thumbscrews.
- Place your chosen eyepiece into the diagonal. The manual recommends starting with the 20mm eyepiece because it will provide the widest field of view. The wider field of view will make it easier to locate and track objects at a magnification of 17.5x.
Using the Telescope:
To move the telescope from side to side, the manual says to loosen the locking screw on the side of the mount and use the panhandle to slowly turn the telescope until your target comes into view in the eyepiece. When you have the telescope in your desired position, tighten the locking screw to hold the position.
To move the telescope up and down, slightly loosen the panhandle by turning it counter-clockwise. Slowly angle the telescope up or down until your target comes into view in the eyepiece. Secure the telescope into position by tightening the panhandle.
If you want to get a closer look at an object, take out the 20mm eyepiece and replace it with the 12.5mm eyepiece, which will increase magnification from 17.5x to 28x.
Suggested objects for observation, according to the manual, are terrestrial objects (which would mean things on earth such as birds, landscapes, wildlife, sporting events, etc.) or the moon. This telescope does not have a finderscope (more on that later), which means it’s not going to be as easy to find and view smaller night sky objects such as planets or stars, and the manual does not mention anything about viewing planets.
The manual says you should be able to see several interesting lunar features with this telescope, including lunar maria, which appear as vast plains, and some of the larger craters. The best views, it says, will be found along the terminator, which is the edge where the visible and shadowed portions of the moon meet.
The manual also says the rotation of the earth means that objects in the sky will move out of your view fairly quickly, so you’ll probably have to change the orientation of your telescope frequently during an observing session.
Warning: NEVER point your telescope at or near the sun due to serious risk of blindness. The manual says: “Observing the sun — even for a moment — will cause instant and irreversible damage to your eye or even blindness.” It also warns eye damage is often painless, so there is no warning to the observer that damage has occurred until it is too late.
The manual also says to respect others’ privacy and do not use the telescope to look into people’s homes. Also, don’t place the lenses in direct sunlight, where the concentration of light rays could cause a fire. Don’t store the telescope in temperatures exceeding 140 degrees Fahrenheit, such as a hot car.
The manual offers some other helpful tips on star hopping, cleaning, troubleshooting, and telescope construction and terminology. One of the more helpful troubleshooting tips is that if you’re having trouble getting anything to focus, and if you’ve just brought the telescope outdoors from a warm house, allow some time for the temperature of the telescope to balance with the outdoor temperature because it is likely that the lens is fogging over. In researching telescope use, I read that it can be helpful to store your telescope in someplace like an unheated garage for 30 minutes before using it outdoors if it’s cold. I also learned through experience that it’s best not to store the eyepieces in my coat pocket for the same reason. I like to set a small plastic table next to the telescope and set the eyepieces on it.
My Thoughts:
My family is new to using telescopes, so we are probably ideal for testing this inexpensive grocery store telescope because I doubt many serious astronomers are going to purchase this; most users are going to be people like us. We initially took it out on our front porch to view a mostly full moon.
I used the 20mm lens with the wider field of view to find the moon and center it in the view, and my husband and kids took turns looking. Then I swapped in the 12.5mm lens so we could view the moon in more detail. We could clearly see craters and valleys, and, as the manual recommended, we saw more features when looking at the terminator where the light and dark sides of the moon meet, which is where shadows are longer and better highlight geographic features. For us at the time, this was near the top of the moon, giving it a rough-looking upper edge. It was a perspective we can’t see with the naked eye, so it was satisfying to be able to see it with a simple budget telescope.
A tip for novices, which I discovered early on while sighting the moon in this telescope: if you’re looking at an object and turn the telescope to the right, the image will move to the left, or vice versa. Keep this in mind as you try to find and center objects in the telescope. Also make sure to use the focusing knob on the side of the telescope to hone in on the image.
Keep in mind I’m new to using telescopes, and there are plenty of things I don’t know (and certainly things I don’t know that I don’t know) but these are a few of my unprofessional observations about our experience with this particular telescope:
- The tripod won’t fall down, but it’s not the most stable and shifts when I use the panhandle to move the telescope. The tripod is lightweight and shifts during normal use. Sometimes a leg or two would come off the ground a bit, and I found it helpful to hold the panhandle with one hand and a tripod leg with my other hand to stabilize it. I had the tripod adjusted almost to full height, and some experts say lowering the height may help, so I’ll have to experiment with lowering it to see if that adds stability. I consulted my friend with the telescope whom I mentioned at the beginning of this post, and he also suggested I might be able to find a better tripod to possibly screw the telescope onto.
- There is no finderscope, which makes it difficult to spot small things in the night sky such as planets, so this seems best suited for viewing the moon or for daytime viewing of terrestrial objects such as landscapes, birds, sporting events, etc. A finderscope is a secondary telescope mounted to the main telescope, and it has a smaller magnification but helps the user to manually aim the telescope at whatever object they want to see. Because you’re looking at a relatively small area when using a telescope, it can be hard to narrow in on what you want to see, which is why a finderscope is so helpful. It’s less of a problem when you’re viewing the moon because of its larger size, but I’m not sure how easily I’ll be able to view planets such as Jupiter, Saturn, or Mars with this. Perhaps with more practice I might be able to do so, and I’ll update if I have any success, but a closer look at the manual seems to indicate this telescope might be mostly suited for viewing either the moon or “terrestrial objects,” which means things on earth such as landscapes, birds, wildlife, or sporting events, with no mention of planets.
- The view often shifts slightly when I let go of the panhandle after centering an object. It was a bit challenging to get the moon perfectly centered in the view because every time I did so and then let go of the handle, it would shift a little. So I had to account for that extra movement when adjusting the telescope.
- This doesn’t come with a carrying case. For the price, I don’t mind. But if you’re going to be transporting this, keep in mind you’ll have to either pack it back in the box it came in or purchase a separate carrying case or bag somewhere else.
I found an article offering tips on how to modify basic “department store” telescopes often purchased as Christmas gifts, including how to add stability and how to improve your aim and make your own finderscope. Some of the ideas might be worth trying on the Aldi telescope.
Overall, though, I’m pretty satisfied with this as a starter telescope for casual observations. It’s competitively priced and does what I expect it to do, with not a lot of bells or whistles. We plan to bring it along on family camping trips, where we can observe the moon and wildlife.
UPDATE (12/22/2020): I have used this telescope several times now, mostly to view the moon, but also to view Saturn and Jupiter during their Great Conjunction on the evening of December 21, 2020, and I viewed the planets again on the evening of December 22 when they weren’t as close but were still a striking sight.
After a few weeks of practice learning how to sight the moon, I was able to view Saturn and Jupiter on the 21st after a few minutes of searching. It helped to aim the telescope at some trees directly below the planets to get my initial bearings and then slowly move the telescope up. On the next night, I was able to find the planets in just about a minute, much to my surprise and delight, using the same technique. So with some practice, I think this can be a decent telescope for viewing planets even with no finderscope.
I read that a telescope with a magnification of 25x would show Saturn as “non-circular” — with higher magnification of 50x to 60x showing the rings. I learned that whether Saturn truly looks oblong through this telescope — using the 20mm eyepiece that magnifies images 28x — depends in part on how windy it is. That’s because this telescope is lightweight, and when the wind blew even a little, the planets danced around like fireflies while I looked through the eyepiece, and I had to wait a minute for some gusts to settle before I could see clearly again.
On the night of the Great Conjunction it was fairly breezy where I live, and it was a bit of a stretch to say that Saturn was oblong. I’m not sure if the wind was the only factor, though, because I’ve also read about conditions such as sky stability or steadiness (often related to atmospheric conditions) that can affect the quality of the view.
Anyway, I set up the telescope again the next night, when the breeze was slightly less, and was able to focus the view more clearly, enough so that Saturn was definitely oval-shaped, and I thought I could just make out some very faint rings, like a fuzzy CBS television logo. I also was delighted to be able to faintly make out some of Jupiter’s moons as teeny tiny specks, and my kids thought that was a cool sight. I also was struck on both evenings by Saturn’s color, which had an orange or tan hue, while Jupiter was simply very bright.

Not a great picture, but I snapped this by holding my cell phone up to the eyepiece. The larger brighter dot is Jupiter and the smaller dot is Saturn. They look much better when you’re actually looking in the telescope yourself.
Besides shaking when the wind blows, the image also shook when I simply turned the focusing knobs, which made it difficult to know when I had it focused just right. To reach optimal focus, I turned the knob in very small increments and then paused to let the image settle, and repeated the process until I was satisfied.
One other thing I learned during a moon-viewing session is that if I overly loosen the knobs used to tighten and lock the telescope into place once I have my targeted image in sight, a small nut or two will fall out and the knobs will pull out of the tripod. My husband and I were able to put things back together after some searching in the grass for the tiny nuts (thankfully, it was just before sunset and we still had light to see by), and we lost one nut all together but somehow the telescope seems to function all right without it.
Despite its shortcomings, though, this is a good starter telescope, and I’m impressed with what I can see through it. It’s been a fun purchase.
The Verdict:
The Explore One Starlight 350 Compact Telescope with Pan Handle Full Length Tripod is a bargain telescope that offers an introduction to observing the moon at night or for daytime observation of objects such as wildlife or landscapes. It has a 50mm aperture objective lens and comes with two eyepieces that magnify objects to either 17.5x or 28x. It does not have a finderscope, so it can be more challenging to find planets or small objects in the sky at night, but after a few weeks of practice looking at the moon, I was able to find and view Saturn and Jupiter at their Great Conjunction. On nights that aren’t too windy, I can focus the image better and I can very faintly make out Saturn’s rings and even some of Jupiter’s moons. This is a fun and budget-model telescope for casual observations of the moon, birds, landscapes, and planets if you’re feeling up for a bit of a challenge. It’ll probably be something that gets brought along on family camping trips in the future.


Thanks for the review. I saw this telescope and was contemplating buying it especially since It’s even less expensive after the holidays.
Would love to order a carry case for it. What’s available?