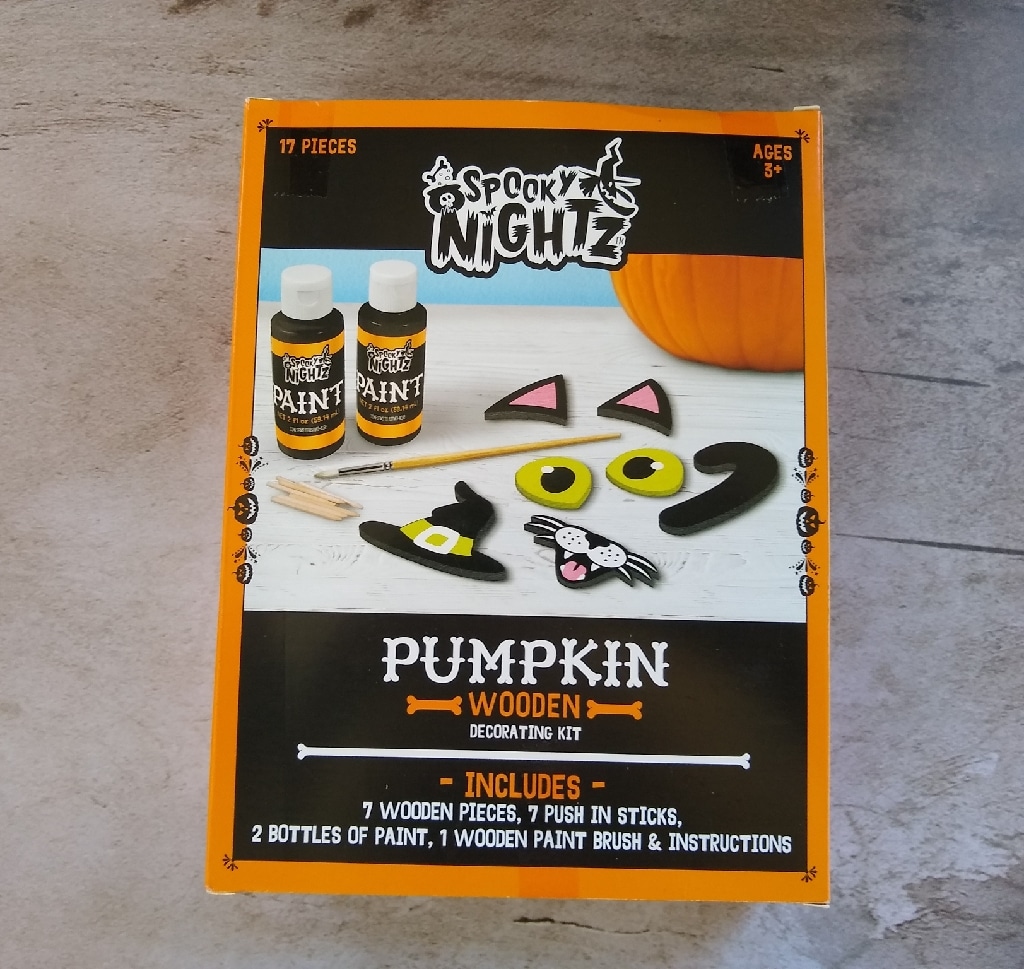
Spooky Nightz Pumpkin Decorating Kit
My family enjoys carving pumpkins in October. In recent years, we’ve gotten fancier about our pumpkin carving, using special stencils to create more intricate or unusual designs. This year, we decided to try some ready-made wooden stick-on accessories, stickers, and paint on some of our pumpkins. Aldi sells kits that helped us do this.
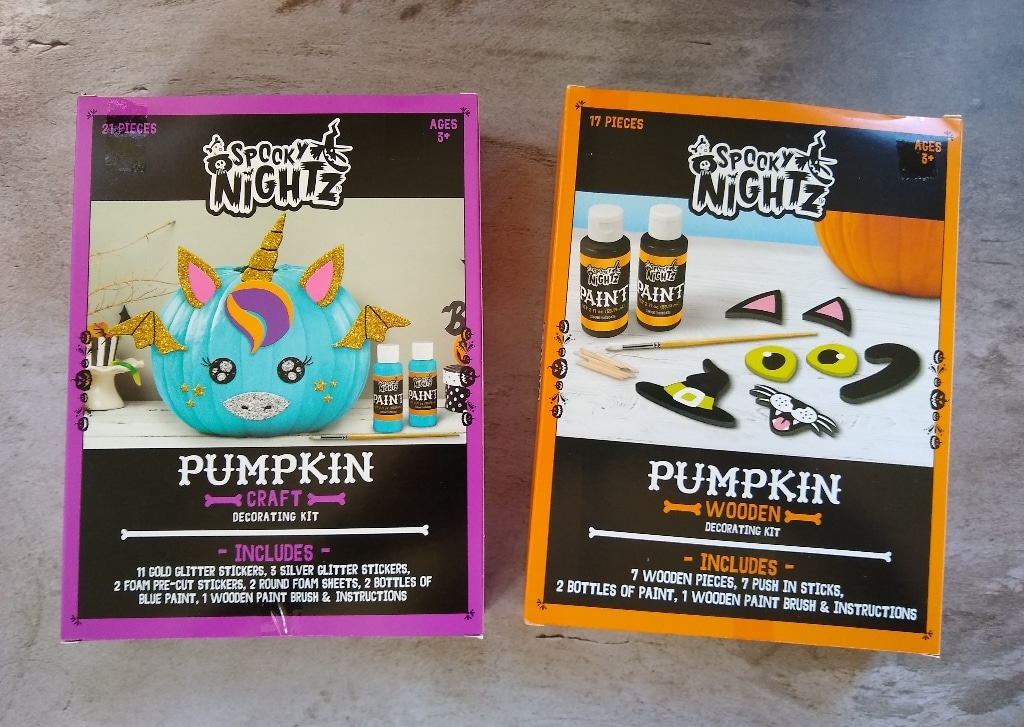
Spooky Nightz Pumpkin Decorating Kits cost $2.99 each at the time of publication.
These are all Aldi Finds (Special Buys), which means they’re only in stores for a short time, and once they sell out, they’re gone.
These kits come in two varieties: a wood push-ins kit featuring a cat, dinosaur, or unicorn; or a painting kit featuring a spider, unicorn, monster, or bat.
I purchased the cat wood push-ins kit and the unicorn painting kit.
The kits are made in China and are for ages 3 and older, although younger children will need assistance since you’re working with paint.
The kits come with detailed, color-illustrated instructions, and some of the instructions are the same regardless of which kit you purchase.
For example, before you begin your craft, you’ll need one pumpkin per kit. You’ll need to buy pumpkins separately, as they obviously don’t come in these little craft boxes. I had both large orange pumpkins and medium-sized white pumpkins on my porch, and my kids both chose to use the medium white pumpkins for this project, saving the larger pumpkins for carving later.
You’ll want some paper towels and a cup of water for rinsing your paintbrush. Cover your work surface with newspapers or paper towels (or send your kids out to the patio, and if your pumpkins are smaller, put them on sturdy paper plates to protect your patio table). Remember to wear old clothes that you won’t mind potentially getting some paint on.
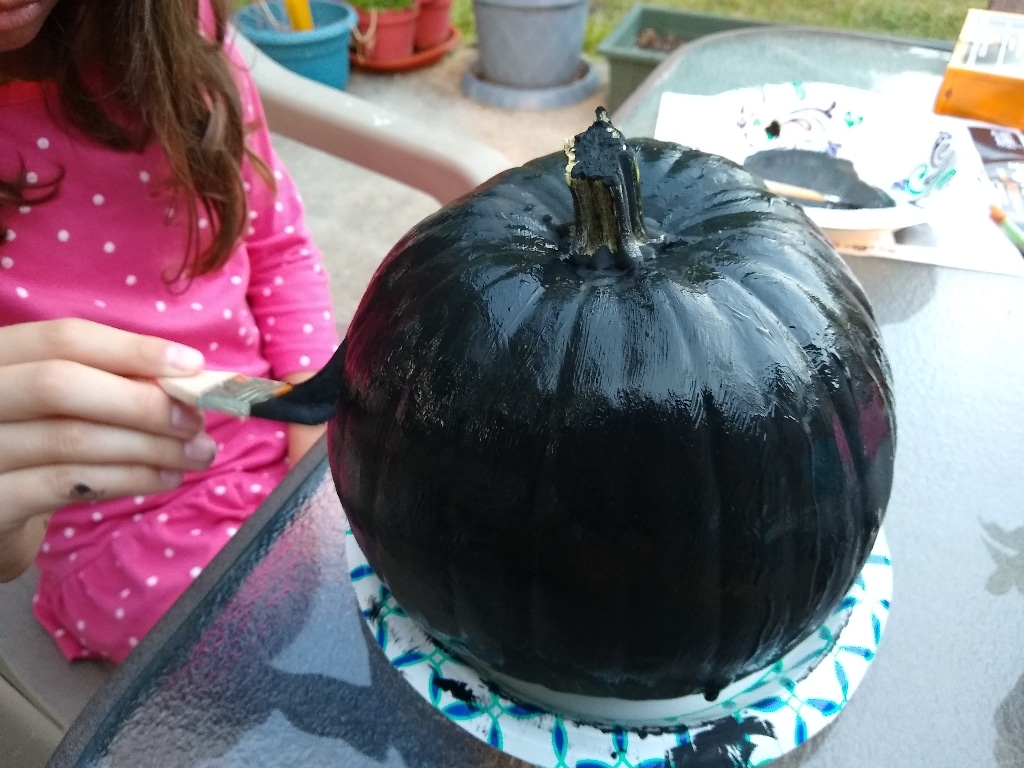
Then, use a dry paper towel to wipe down your pumpkin, removing any dust or dirt before applying paint. Paint your pumpkin using the brush and paint in your kit, and allow the pumpkin to dry fully — about 2 to 3 hours — before handling. (Our pumpkins looked best with a second coat of paint, so allow extra time for that additional layer of paint to dry.)
The paintbrushes in these kits are small for painting an entire pumpkin, so if you have larger paintbrushes around the house, you might want to use those instead to make the job go faster.
We found that one bottle of paint was more than enough to cover one medium-sized pumpkin with two coats. Since each kit comes with two bottles of paint, we’ll save the remaining paint for future craft projects.
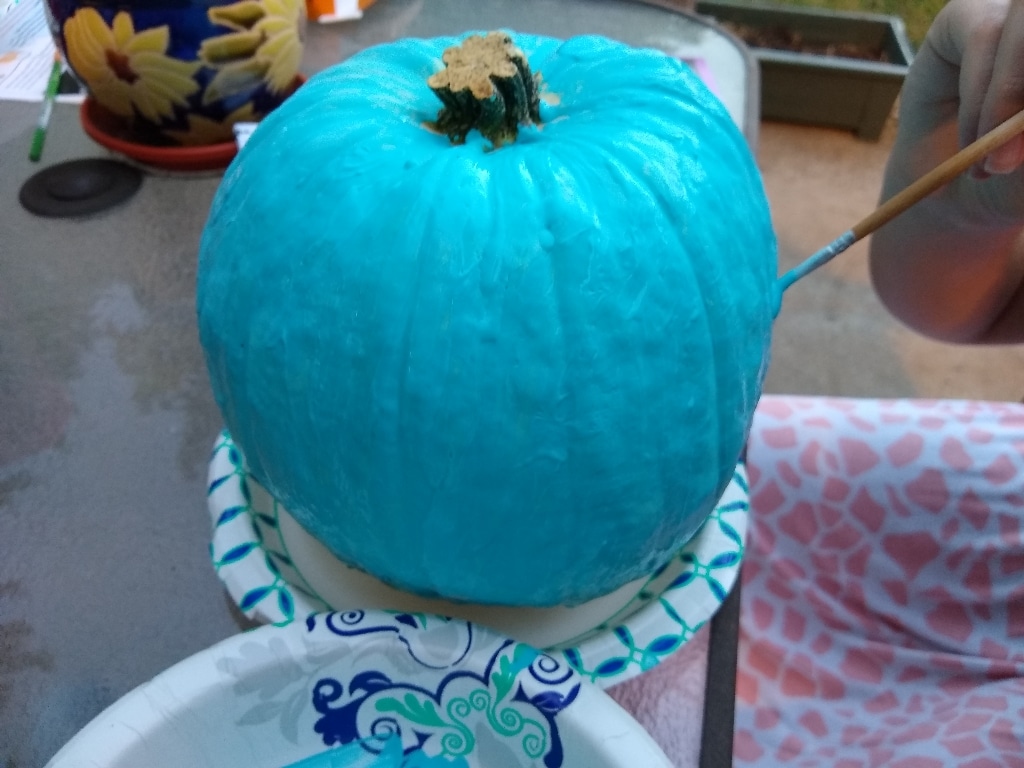
Painting your pumpkin is optional. You can simply decorate a plain, unpainted pumpkin with the wood push-ins or the stickers, depending on your kit. My kids opted to paint their pumpkins, but whether you do so is up to you.
After you’ve painted — or not painted — your pumpkin, you’re ready to use the accessories in the kit to decorate it. The instructions state to use the images provided as a guide, and to arrange all the pieces in front of you to lay out your design before adding any pieces to the pumpkin. Position each piece one at a time.
Read on for a closer look at our two kits.
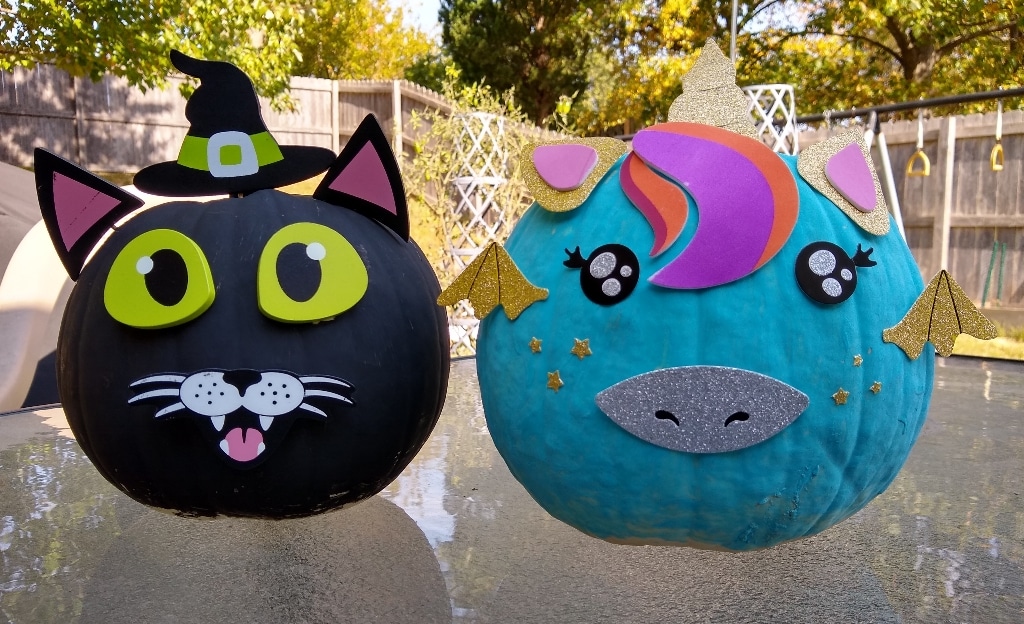
Spooky Nightz Cat Pumpkin Wooden Decorating Kit
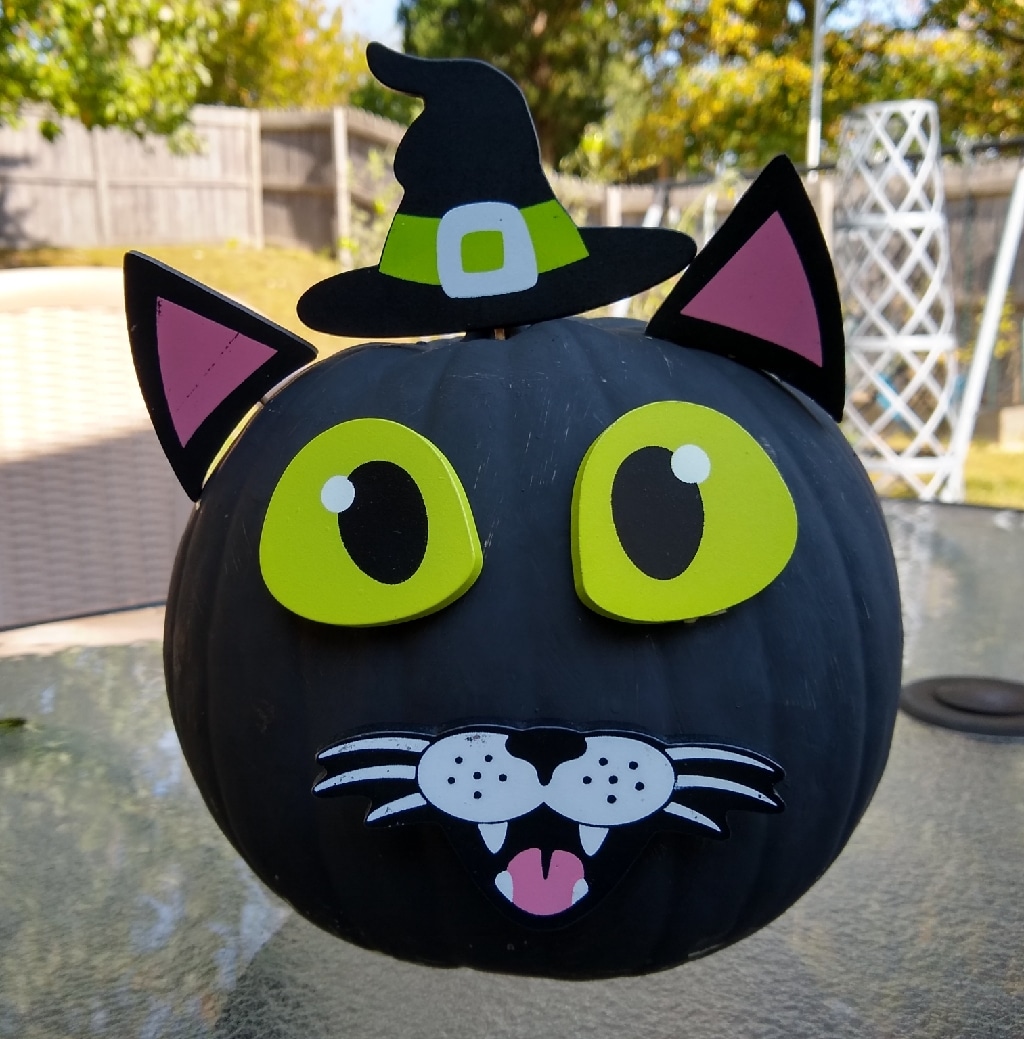
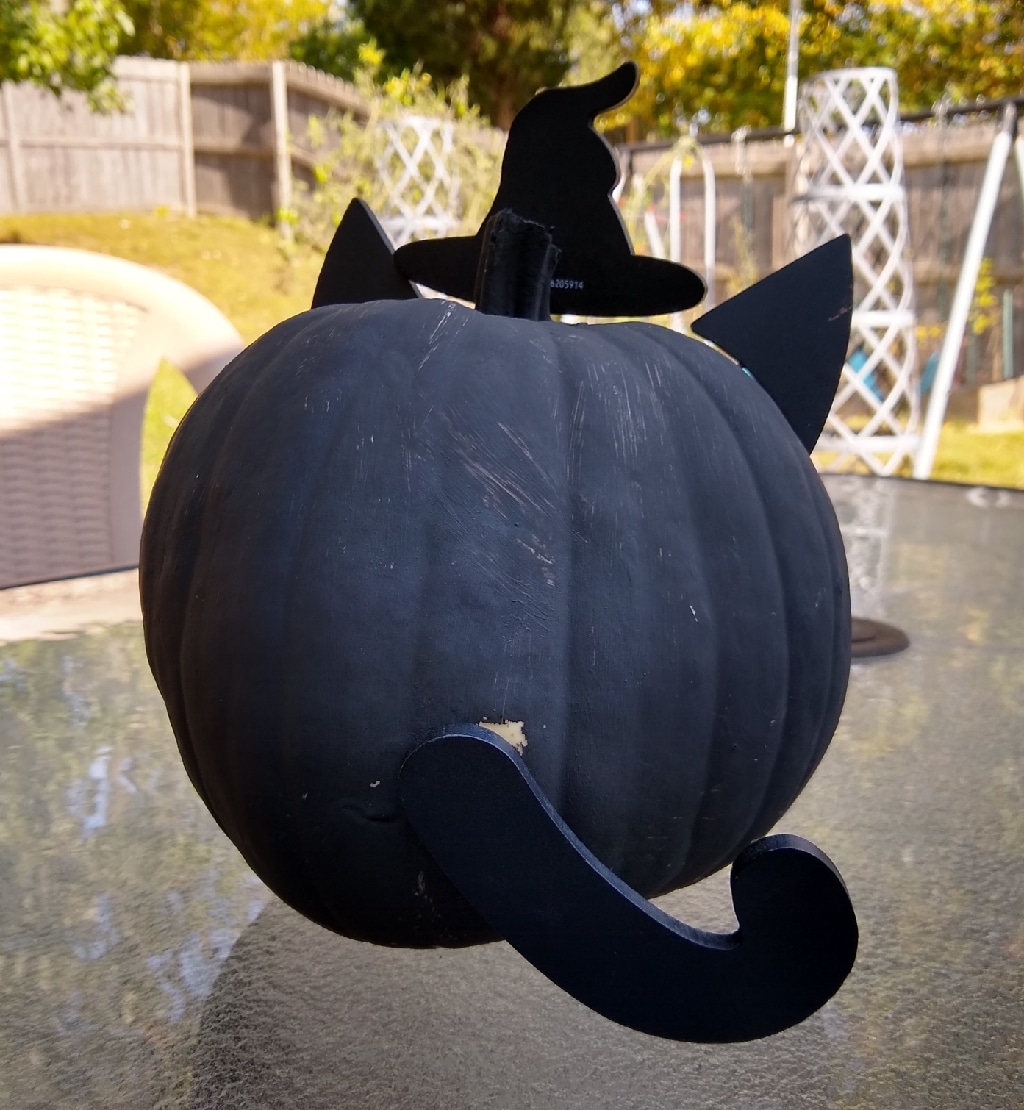
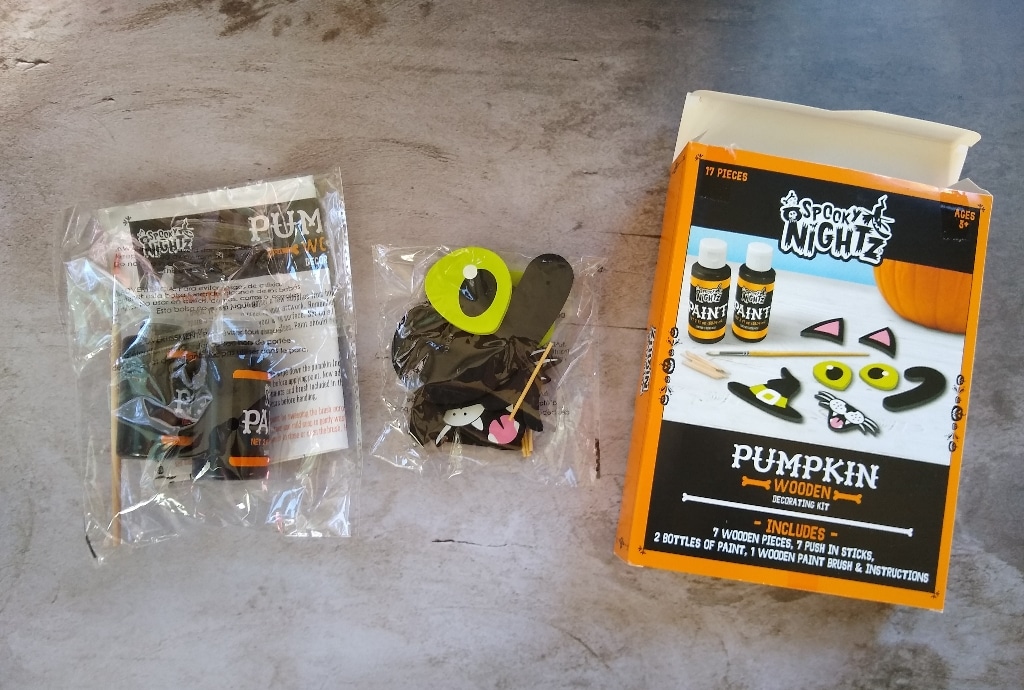
This kit has 17 pieces total and includes 7 wooden pieces, 7 push-in sticks, 2 bottles of paint, 1 wooden paint brush, and instructions.
To position decorations on your pumpkin using this wood push-ins kit, place a push-in stick into the existing holes behind each wooden piece. Then position the piece in the desired area on the pumpkin, and use slight pressure to puncture the pumpkin with the wooden push-in. Continue to slowly push the piece into the pumpkin until the decoration stays in place. Repeat this process with the remaining pieces until your pumpkin is fully decorated.
This was my favorite type of kit out of the two that we tried. The wooden pieces are easy to use and they look good. Even better, these push-ins kits can be reused in following years if you save the pieces.
My only caveat is to be careful not to push the wooden sticks too far into the pumpkin, or they might get stuck, and the only way to remove them would be to cut into the pumpkin.
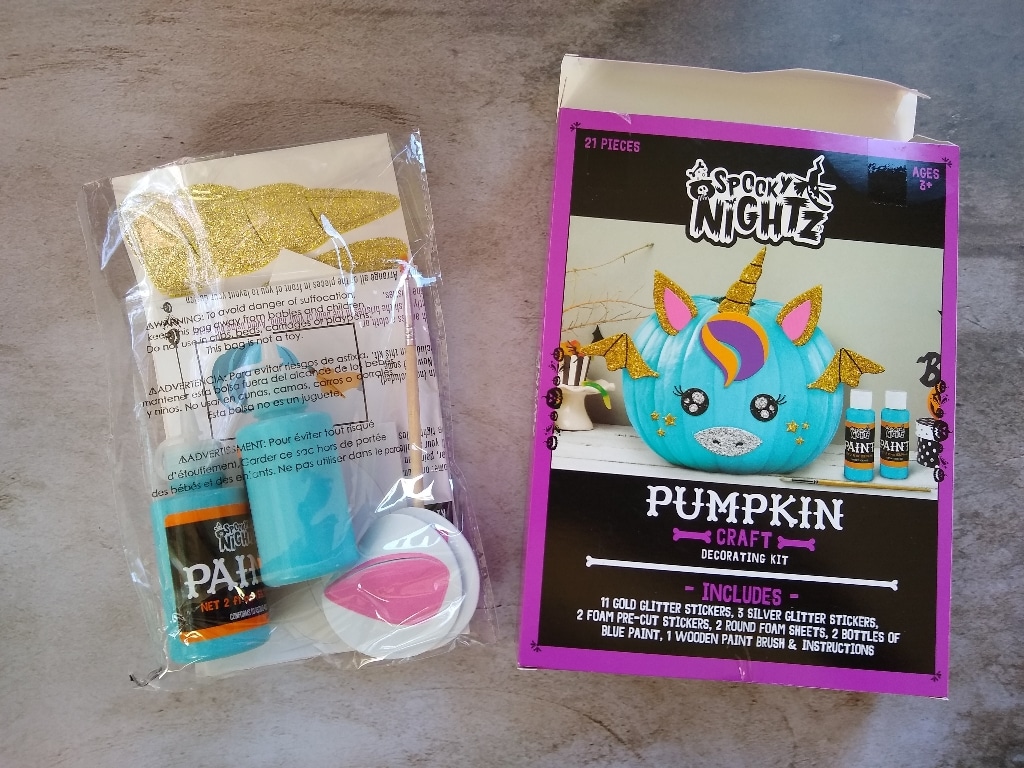
Spooky Nightz Unicorn Pumpkin Craft Decorating Kit
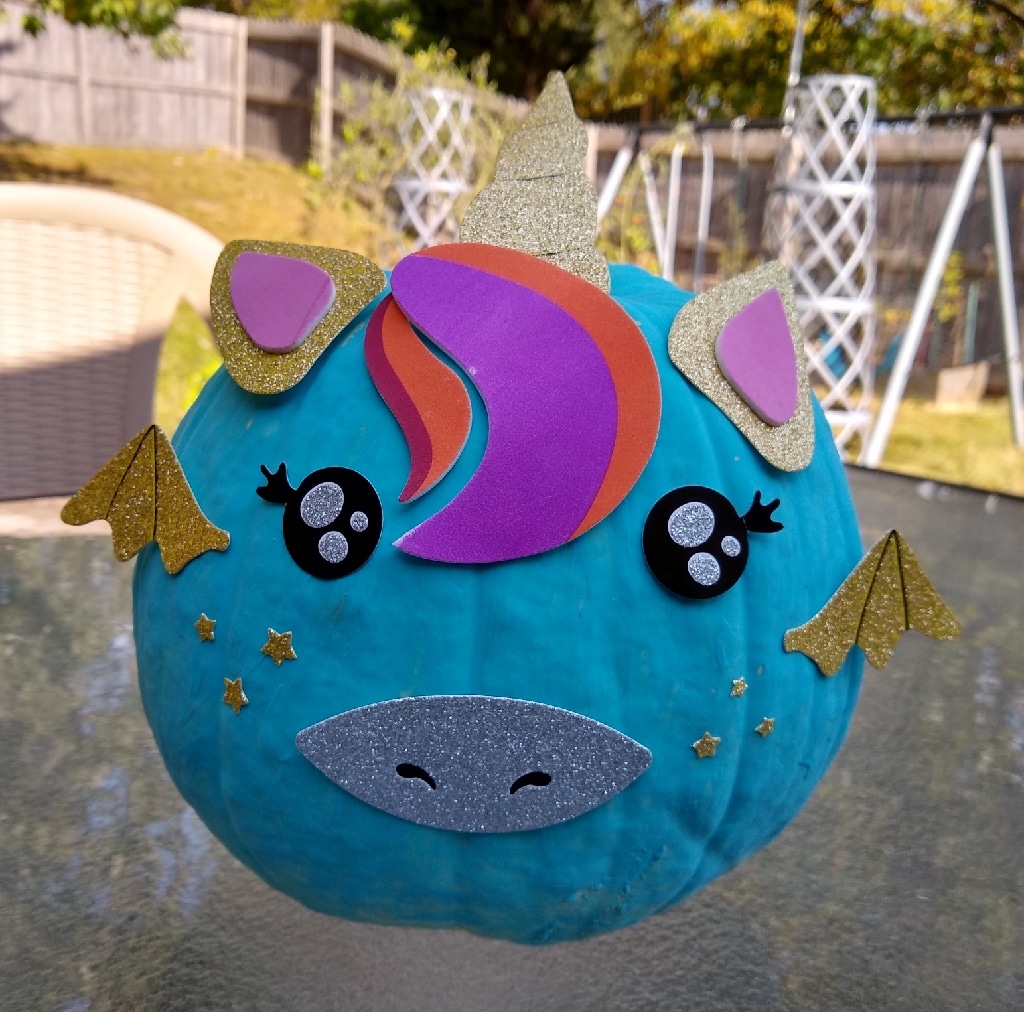
This kit has 21 pieces total and includes 11 gold glitter stickers, 3 silver glitter stickers, 2 foam pre-cut stickers, 2 round foam sheets, 2 bottles of blue paint, 1 wooden paint brush, and instructions.
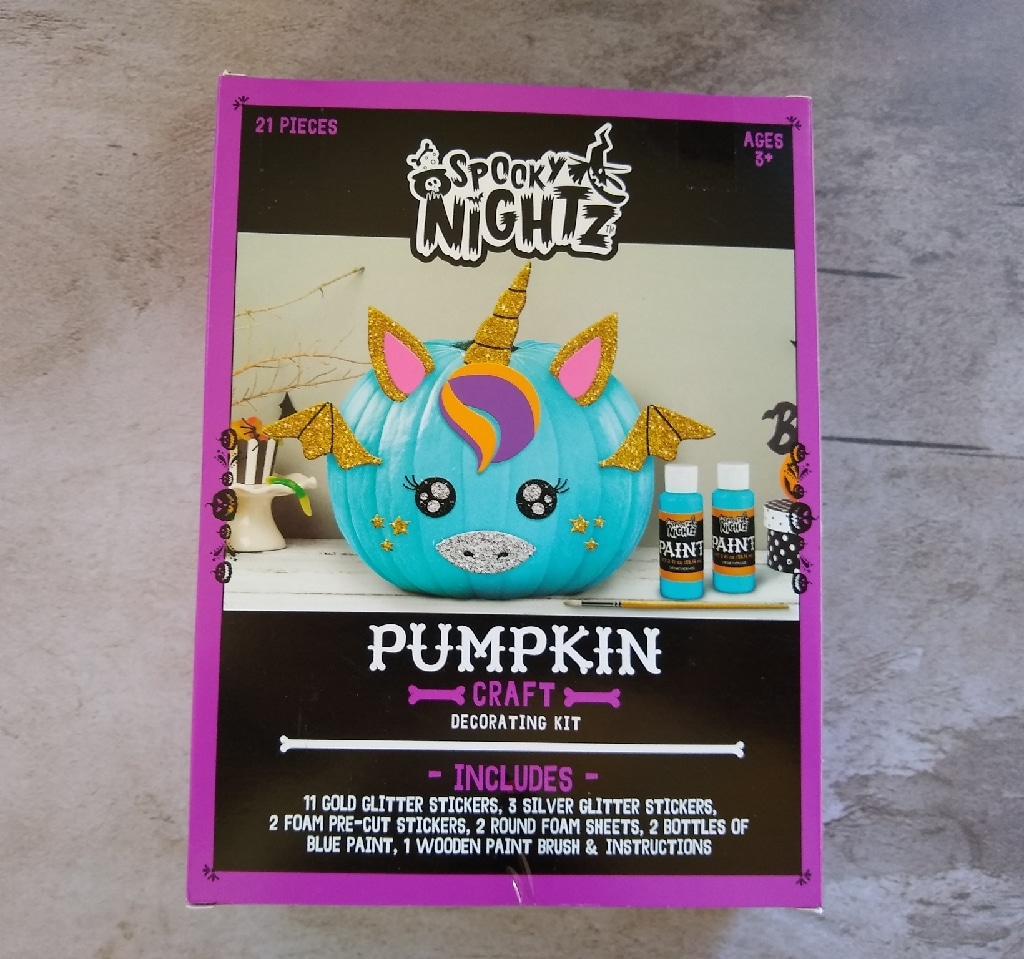
To position decorations on your pumpkin using this paint/sticker kit, simply peel the backing away from each sticker and stick onto the pumpkin.
While my daughter likes the look of this kit, I didn’t care for this sticker kit as much as the wooden push-ins kit. That’s because the stickers don’t stick on our pumpkin as well as I would like. So far, they’re staying on, but they don’t seem that secure. We’ll see how well they stay on through the rest of the month.
The Verdict:
Spooky Nightz Pumpkin Craft Kits are a unique alternative to carving pumpkins. Kits come in a variety of animal or mythical creature designs, and you can choose a kit with wooden push-ins or a kit with stickers. While the kits with stickers work okay, we think the wooden push-ins are superior because the stickers are not as sticky as they could be. All of the kits come with optional paint. These kits make a great family activity and add some whimsy to your October porch decor.