Last Updated on December 15, 2017
Every fall Aldi offers pumpkin carving kits as Special Buys (ALDI Finds). This year, the store offered two different kits consisting of carving tools and booklets filled with patterns ranging from easy to hard. I’ve always tried to use a carving kit ever since the year one of my husband’s cousins sliced through a tendon in her hand when a traditional kitchen knife slipped while she was carving a pumpkin. Kits like this are definitely safer.
Anyway, here’s my adventure with the Crofton Pumpkin Carving Kit, which includes a broken carving blade.
The Kit:
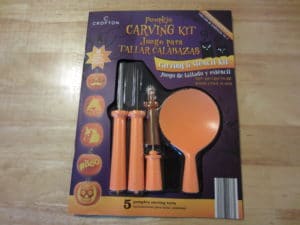
The kit I purchased included 10 stencils and five carving tools: a large carver, small carver, drill tip, scraper, and perforator. A page near the front of the book showed all the finished designs on pumpkins, including a twist on a traditional jack-o-lantern face, a face with sunglasses and a mustache, witch legs, a cat, a Day of the Dead skull, a ghost, a troll (who looked a lot like Poppy from the movie Trolls), a robot (who looked kind of like a Minion), a unicorn, and the quotes “#Boo” or “#Spooky.
The Directions:
Flipping through the book, each page featured one of the stencil designs printed full size, with picture instructions indicating that you were to cut out the page and tape it over your pumpkin where you intend to carve. Each design had a useful graphic at the top indicating the pattern’s difficulty level, with one bat being easy and four bats being hard.
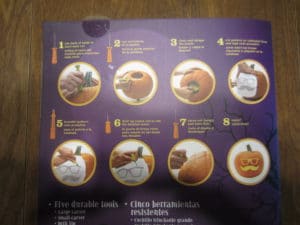
The back cover of the kit booklet had more detailed instructions. It says to cut out the bottom of your pumpkin, clean and scrape the inside, tape your pattern onto your pumpkin, and transfer the pattern to the pumpkin using the perforator and drill tip. The perforator is a small wheel with teeth you can roll to leave a dotted line, marking where you will cut later. The drill tip looks like a small screwdriver and is used to mark the pattern in smaller, more detailed areas. Finally, you remove the paper pattern and get to work carving your pumpkin using the small and large carvers.
The Carving Experience:
I have two daughters, and I bought each of them a pumpkin (around $2.29 each at my local Aldi) and let them pick what pattern they wanted for their pumpkins. One daughter opted for the cat, which was rated easy at one bat out of four. My other daughter asked for the troll, which was rated more difficult at three bats out of four. My pumpkin carving experience is limited to fairly traditional jack-o-lantern patterns, and I’ve done a very simple cat variation on the traditional jack-o-lantern the last couple of years. I wasn’t sure how I’d handle something that was three bats.
I started with the cat because it was easier. I had a little trouble getting the pattern taped on smoothly because it’s just not easy to fasten a flat paper to a round pumpkin. Once that was done, though, it was easy to use the perforator and drill tip to punch through the paper pattern, leaving small holes visible on the pumpkin’s surface after I removed the paper.
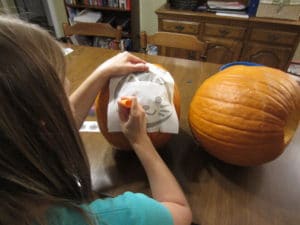
The carving started well, and the handles were comfortable to hold, but when I switched from the large carver to the small carver to do some detailed cutting of the cat’s eyes, the metal blade on the small carver snapped apart while it was in the pumpkin while I was working on the second eye. I had only cut a few inches worth of pumpkin before it broke. It didn’t simply break off of the plastic handle. (I’ve purchased pumpkin carving kits from other stores and had the metal blade simply fall out of the cheap plastic handle.) In this case, the metal itself broke off just before it met the handle, leaving a small amount of the metal blade still attached to the handle.
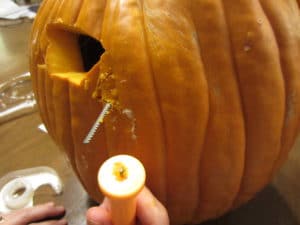
That was a bummer because it meant I had to do the rest of my carving with the larger knife. There isn’t enough of a size difference for this to be catastrophic, but it might make some of the more intricate designs less doable. I was worried about whether my large carver would hold up, but it was fine. I suspect the small carver broke because it was a thinner metal blade that simply wasn’t large enough — and therefore strong enough — to withstand the rigors of pumpkin carving.
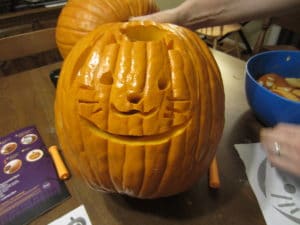
Anyway, I finished carving the cat, and it was pretty cute.
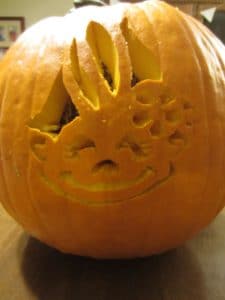
Then I moved on to the troll. It took longer to mark out the pattern using the paper stencil because it was a more complicated design. It was also more difficult to see exactly where I needed to carve after I took off the paper because many of the cuts were so close together. I really wished the small carver hadn’t broken because I struggled a bit with the flower in the troll’s hair and with a swirly cut on each side of the troll’s head (ears, maybe?). Those features didn’t turn out exactly like the pattern because I had difficulty seeing where to cut and my carver was a bit on the large side for some of those small details, but ultimately I think I made it look okay. The troll was worth the three-bat difficulty rating, but it was not an impossible task.
The Finished Pumpkins:
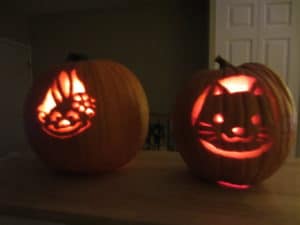
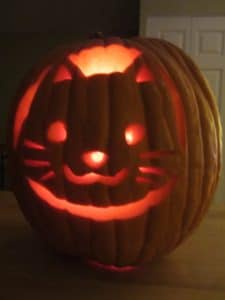
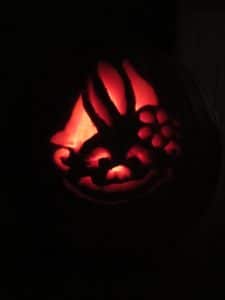
It took me about an hour to carve both pumpkins (that was after I had my kids clean the seeds and pulp out). You’ll want to set aside a good chunk of time for this project, especially if you’re carving more than one pumpkin. (Be warned your hand will get tired!) We set some candles inside our pumpkins and posed for a few fun pictures with the lights turned off. Then our pumpkins got transferred to the front porch, where they will greet visitors and neighbors for the next few days before we light them up for Halloween night.

The Verdict:
The Crofton Pumpkin Carving Kit comes with 10 patterns — many of them are fun and whimsical — and 5 carving tools: a large carver, small carver, drill tip, scraper, and perforator. The instructions are easy to follow. Our only disappointment was that the metal blade broke off of our small carver while in use. The kit advertises that it contains “5 durable tools,” but we found that only four out of the five tools were truly durable. I was still able to finish carving our pumpkins using the large carver, and they turned out fine, but I wished I could have used that small carver for some of the smaller details.

