
Gardenline Interlocking Garden Edging
This post contains affiliate links.
It’s that time of year when people start cleaning up their yards and tackling garden chores. Maybe you’re cleaning out last year’s dead foliage in your garden, raking up leftover leaf piles, building a raised bed, taking stock of your collection of planters, or even planting some cool weather crops such as peas or lettuce. I’ve been eyeing some spring projects in my own garden, including buying some new edging for a shady garden bed near my patio.
Aldi often seems to sell just what I need exactly when I need it. In the case of garden edging, I found Aldi selling some this week, so I picked up a pack.
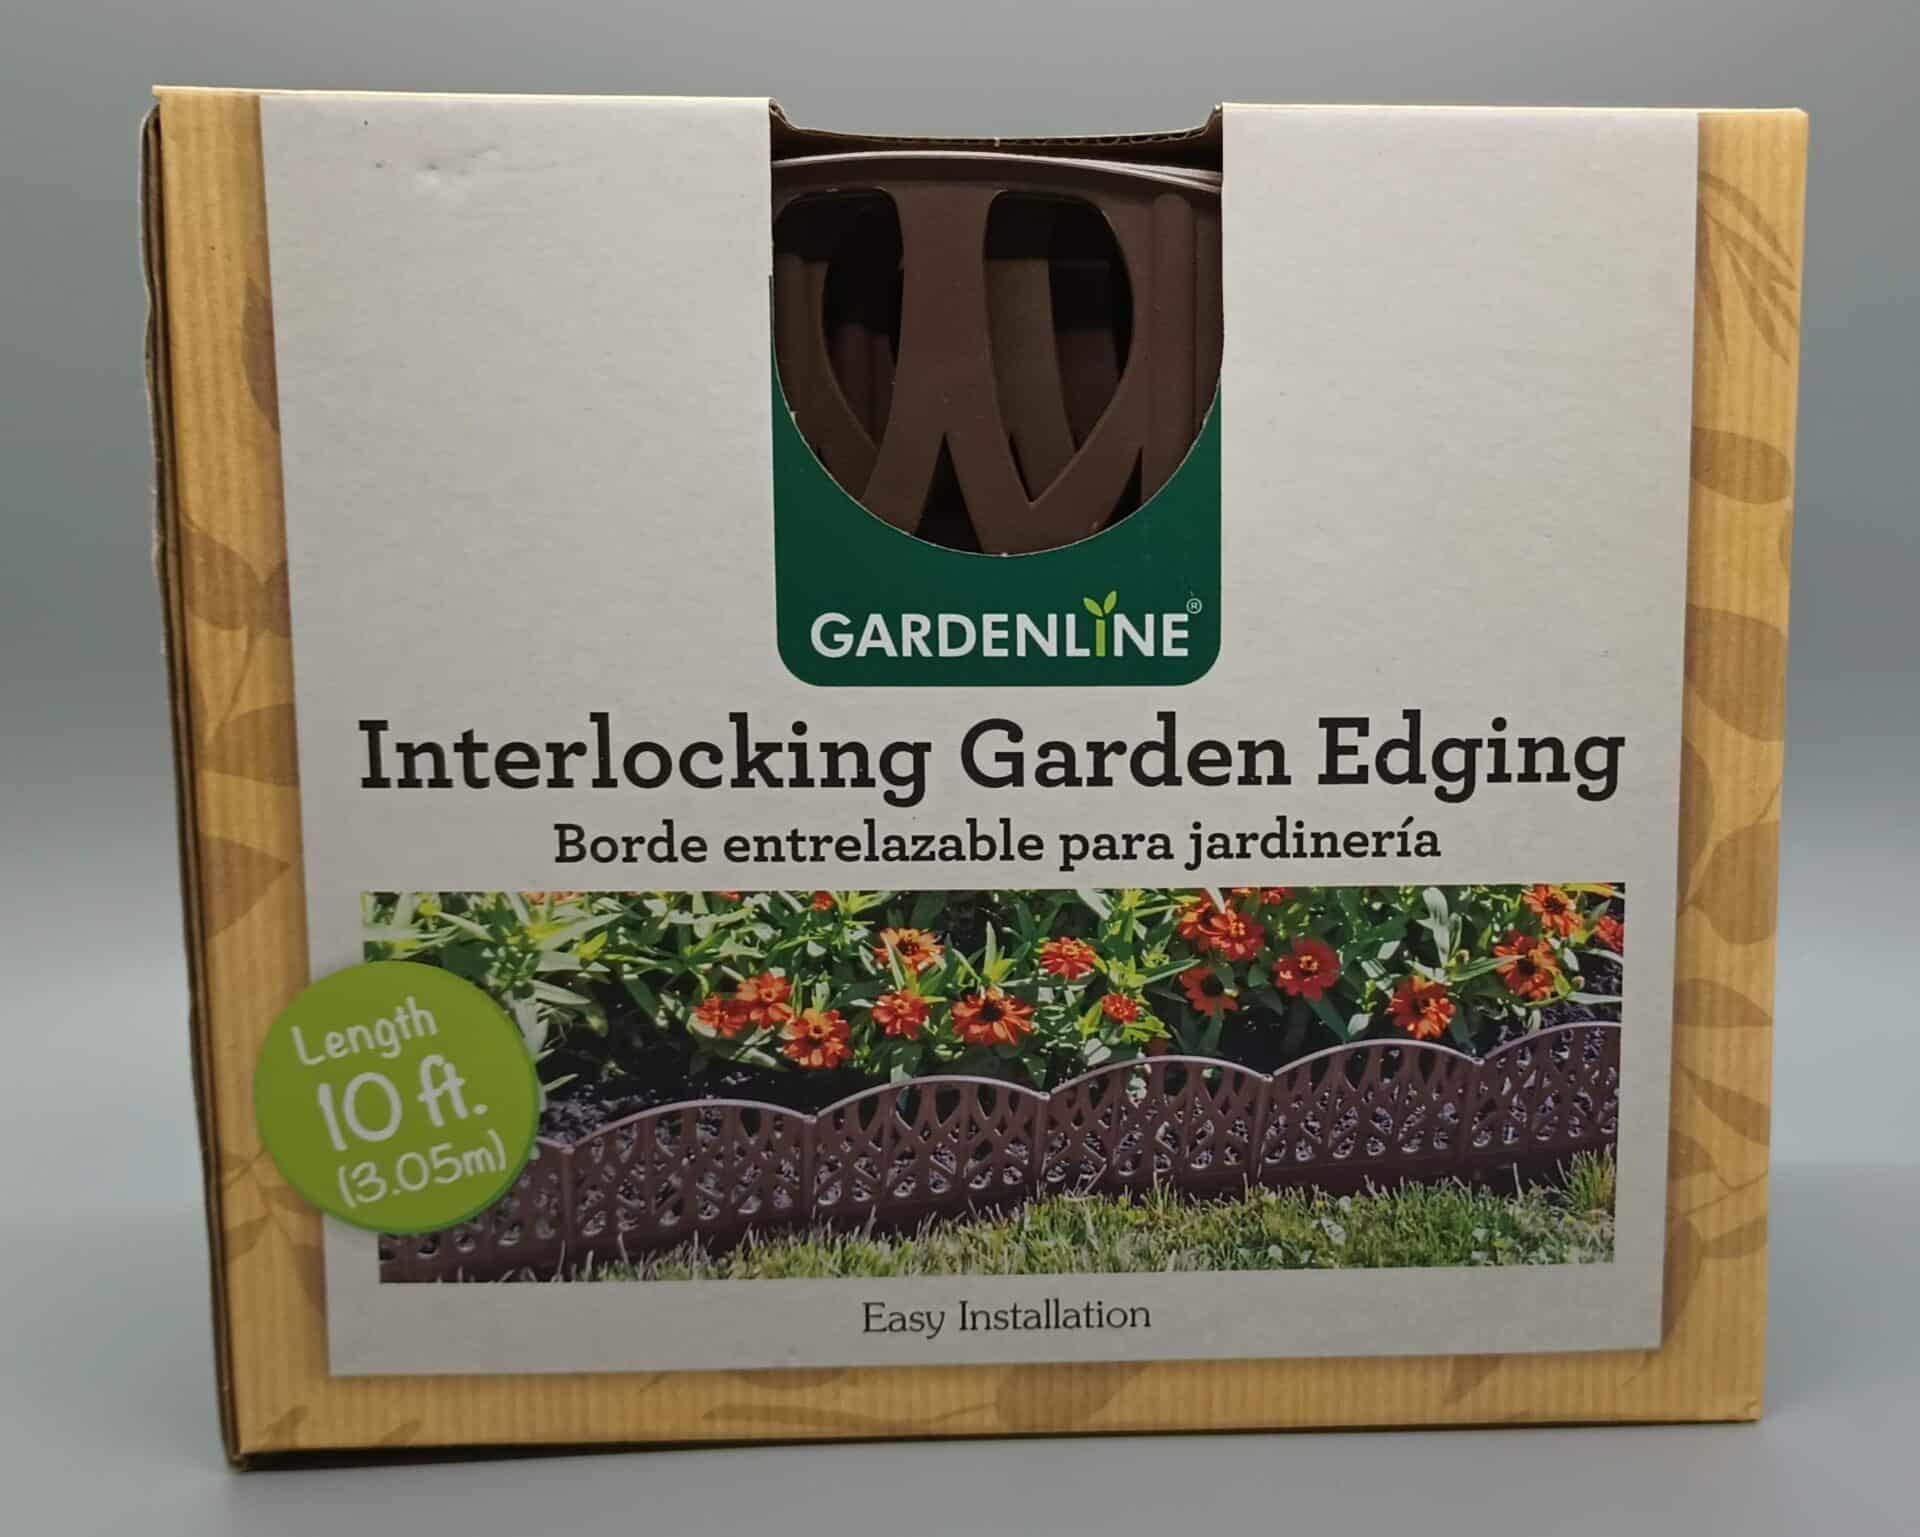
Gardenline Interlocking Garden Edging is an Aldi Find. That means it’s only in stores for a short time. Each store gets one shipment, and after that sells out, it’s gone unless Aldi brings it back next year. Aldi does not offer online ordering for products that aren’t in stock at your area store.
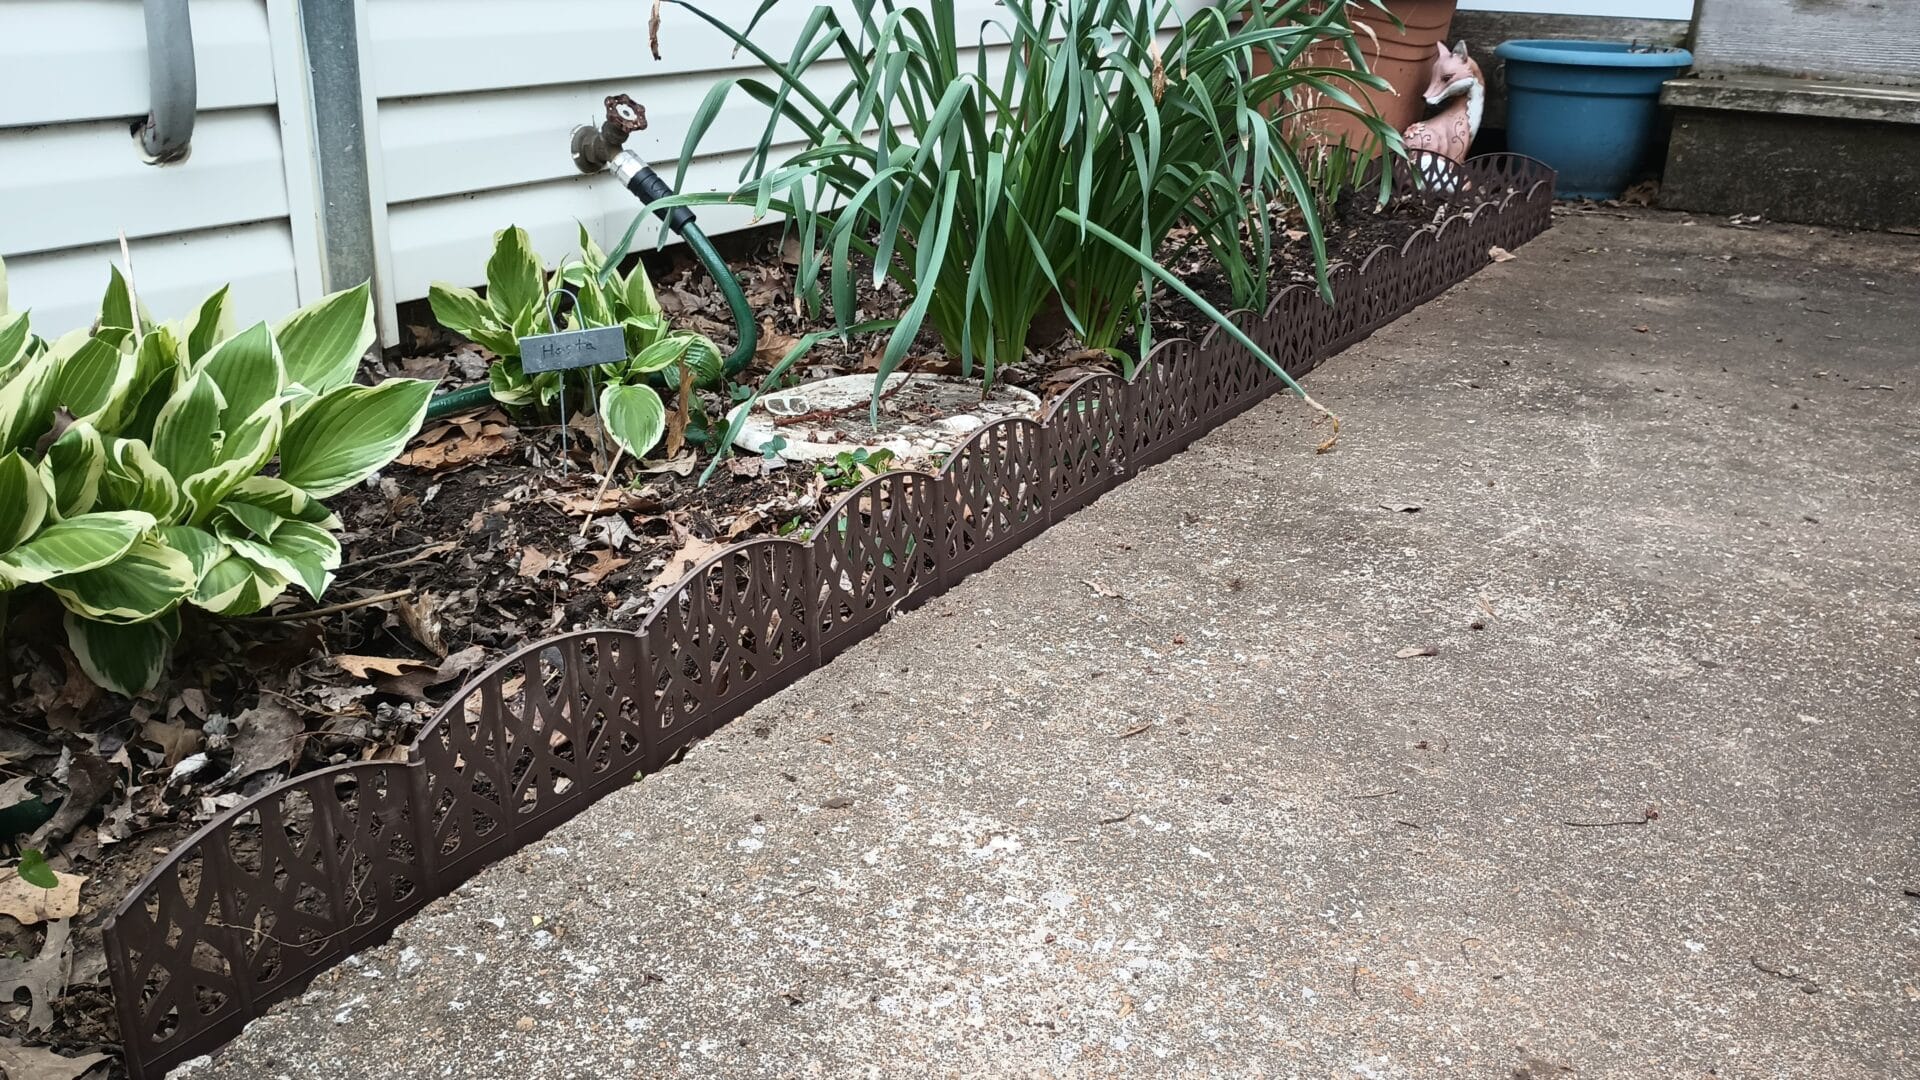
This cost $4.99 for a package that contains 10 feet of edging. That comes out to about 50 cents per foot. Prices for interlocking garden edging vary on Amazon, but this Aldi edging looks to be a good deal.
This is sold under the Gardenline brand. There is no company called Gardenline. Instead, that’s the private label Aldi uses for gardening products it sources from various suppliers.
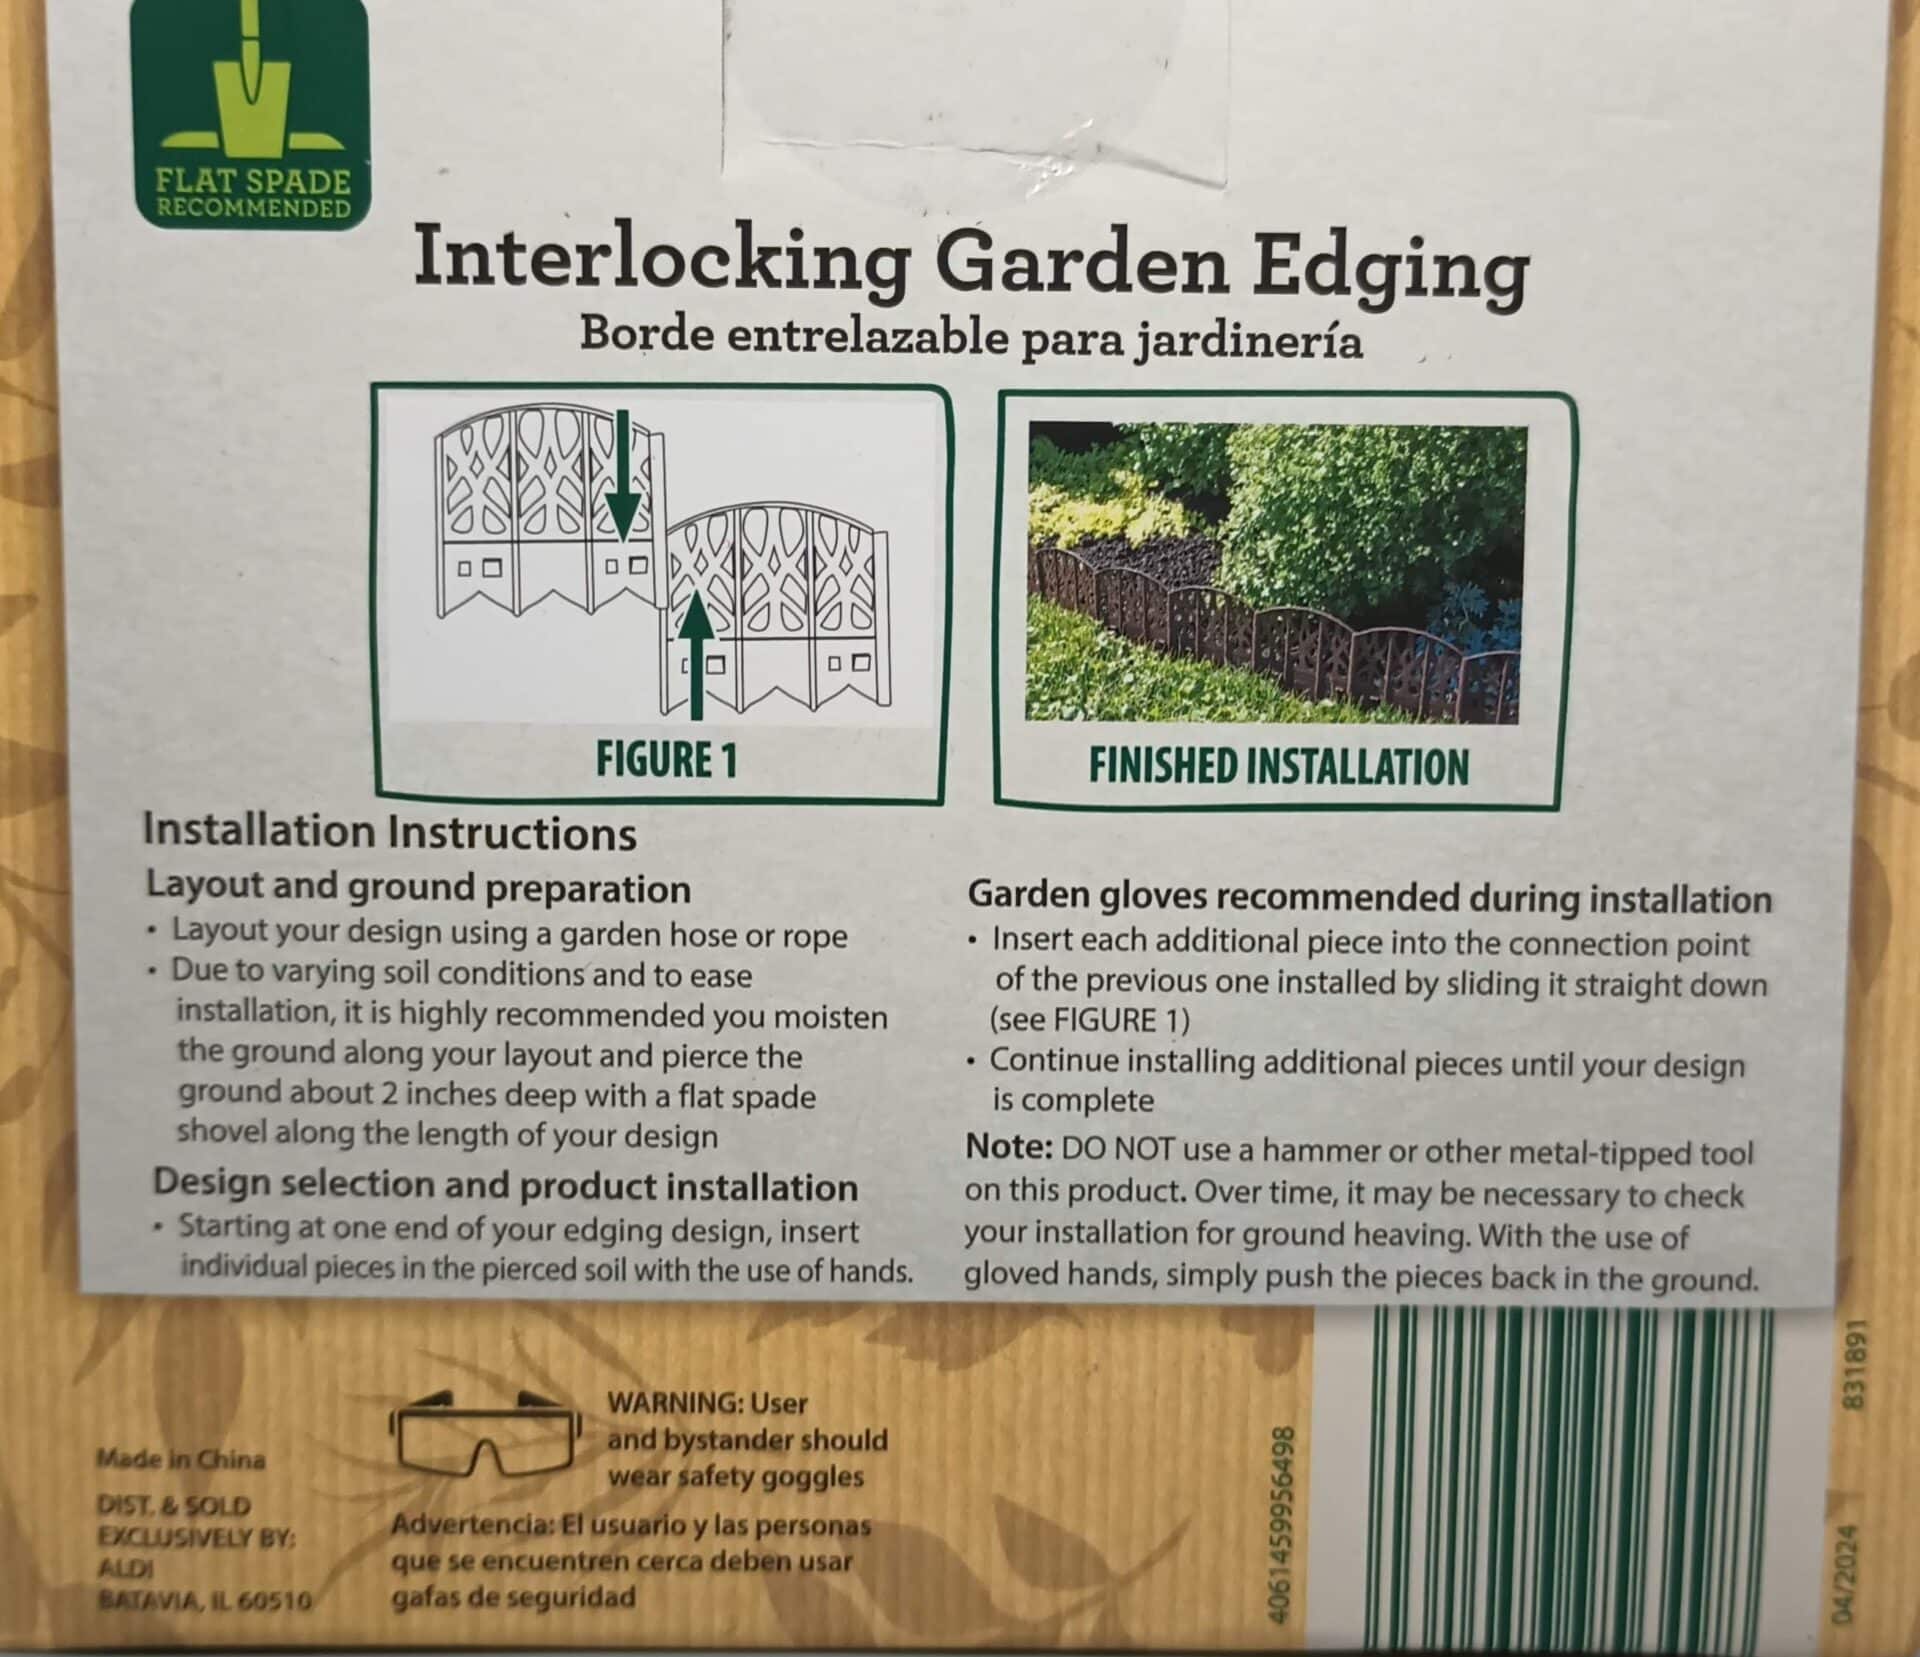
The package states this offers easy installation. Start by laying out your design using a garden hose or rope. The instructions state that due to varying soil conditions and to ease installation, it is highly recommended that you moisten the ground along your layout and pierce the ground about 2 inches deep with a flat spade shovel along the length of your design.
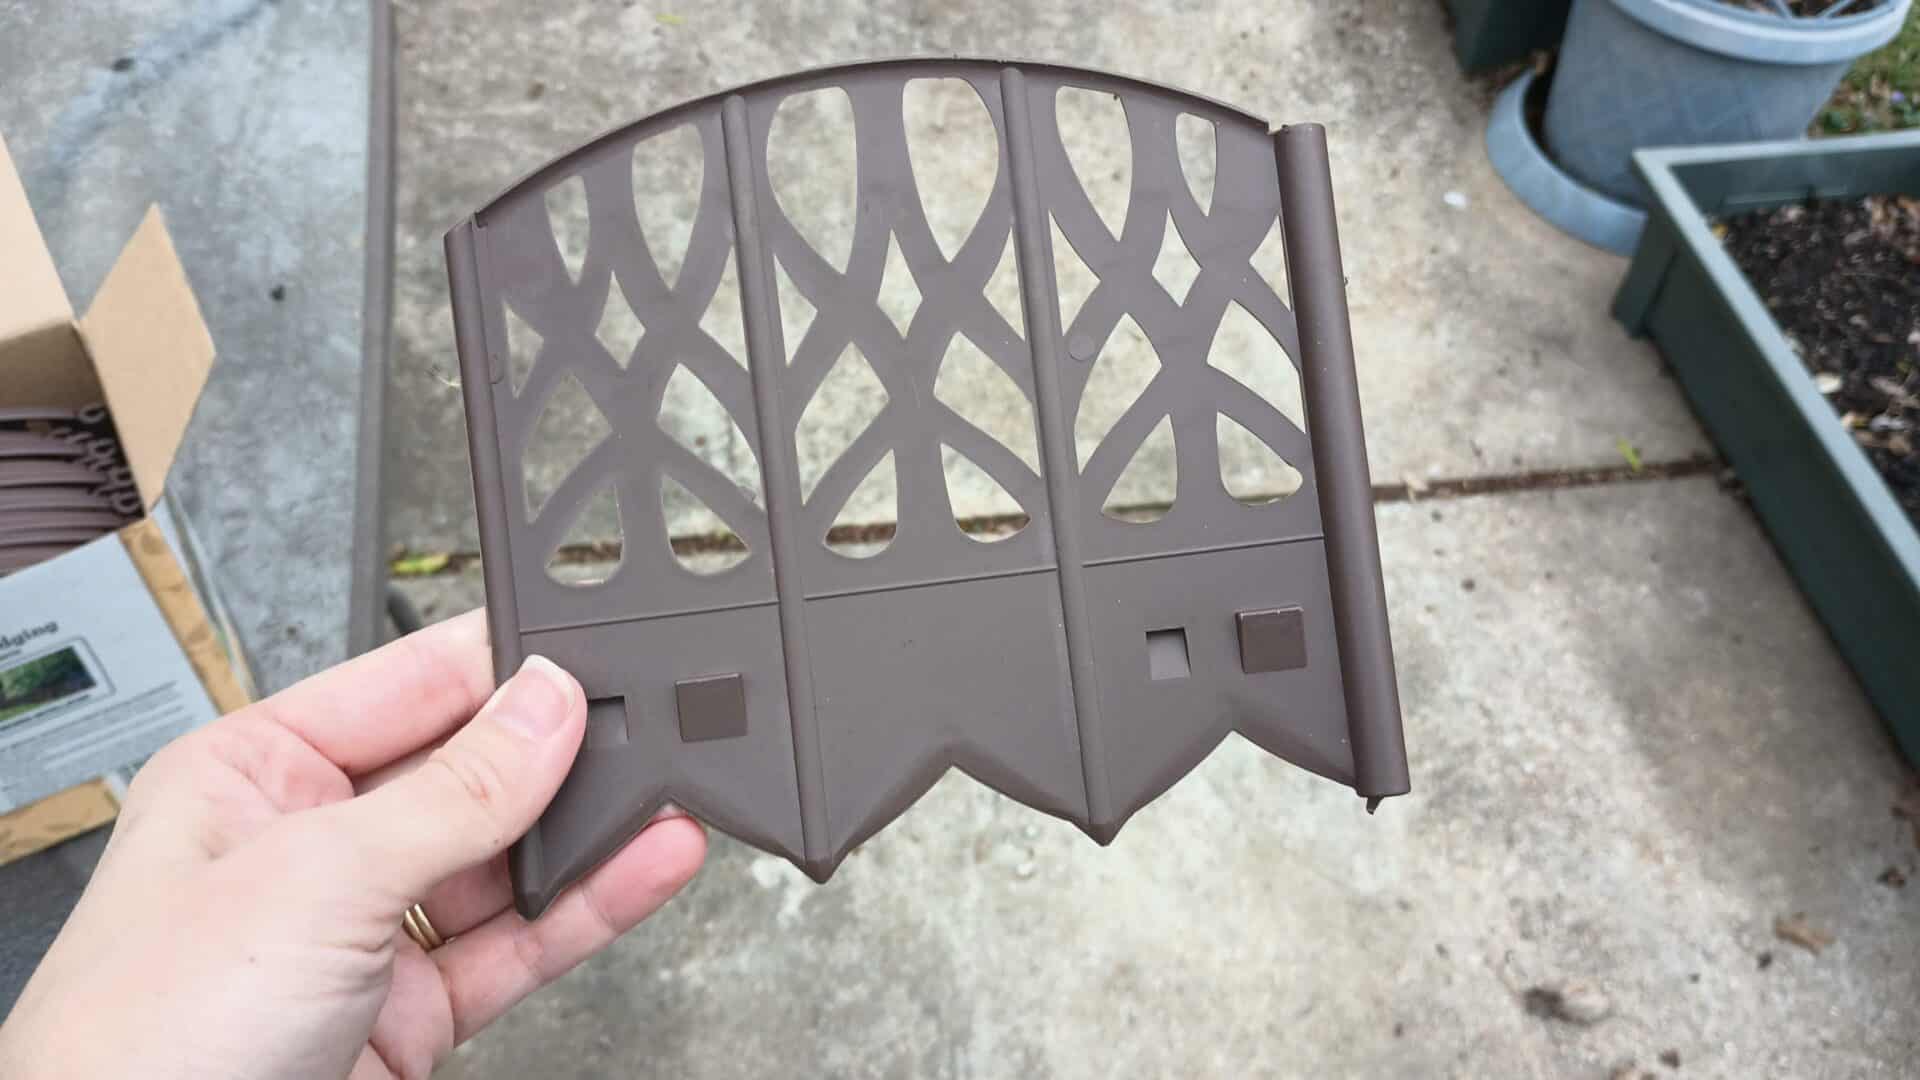
When you open the box, you’ll find 20 small pieces of edging. Since there is a total of 10 feet of edging in the box, each piece is about 6 inches wide.
The directions recommend wearing garden gloves and safety goggles during installation. To install, start at one end of your edging design and insert individual pieces in the pierced soil using both of your hands. Insert each additional piece into the connection point of the previous one installed by sliding it straight down (see the figure on the back of the box). Continue installing additional pieces until your design is complete.
The instructions state you should not use a hammer or other metal-tipped tool on this product. Also, over time it may be necessary to check your installation for ground heaving. Using gloved hands, simply push the pieces back in place in the ground.
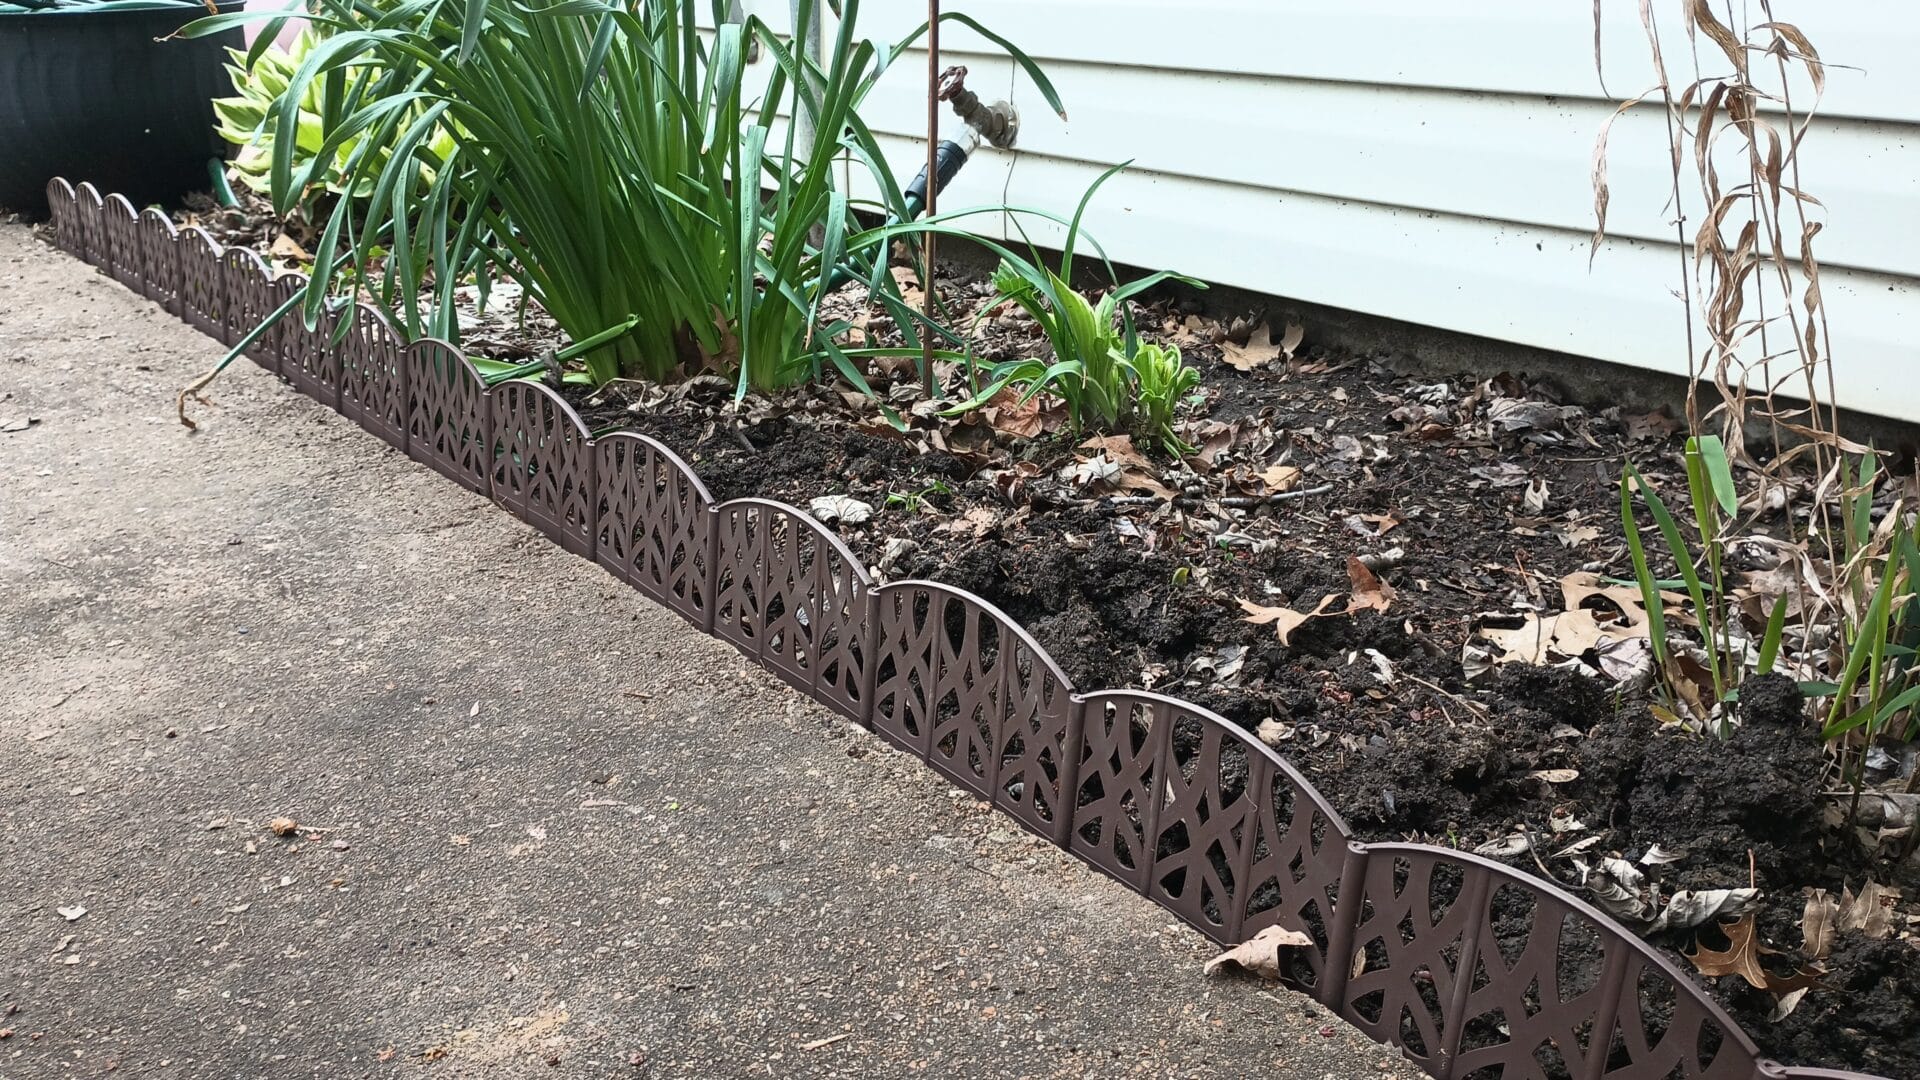
This edging was not hard to install, but you do need a shovel to loosen the soil, as the directions recommend. The edging doesn’t slice into unprepared soil as easily as some other types of edging I’ve used, but using a shovel to prepare the ground solves that problem.
The individual pieces slide together easily enough, and this looks good around my flower bed. It’s not tall, but that’s why it’s edging and not a fence. If you need something simple and inexpensive to define a flower bed’s borders, this will do the job.
The Verdict:
Gardenline Interlocking Garden Edging features 10 feet of plastic edging to help define your garden border. It’s easy to install if you use a shovel to loosen the soil first. This is an affordable way to add an accent to your outdoor space.


I bought this last year (2023) when I first saw it at Aldi and I love it. I took almost all of it out over the winter and stored it in an unheated metal shed, but to see how the plastic would hold up I left a few pieces in to be exposed to the elements – snow, ice, freezing/melting cycles, strong winter sunlight. I just finished installing the last of the year-old edging two days ago and I can’t see a difference between the pieces that were stored and the pieces left out. No cracking or breakage, and no color fading. I don’t know how many years this will hold up for, but I’m pleased I’m getting at least two seasons out of it. I have about 150 feet of it in use around the property in both straight line and curved flowerbed borders.